Location Rows
A Location row adds geographic location data to a page. Each location row has a start location and optionally an end location (for linear walks where the finish is different from the start).
Each location includes:
- Description — a place name or landmark
- Postcode — with a clickable link to Google Maps
- Grid Reference — at 6, 8, or 10-digit accuracy, with a clickable link to Grid Reference Finder
- Latitude and Longitude
You only need to enter one of these — the system works out the rest automatically.
Location rows serve two purposes:
- When set to visible, the location details are displayed on the page for visitors to see, with clickable links and copy buttons
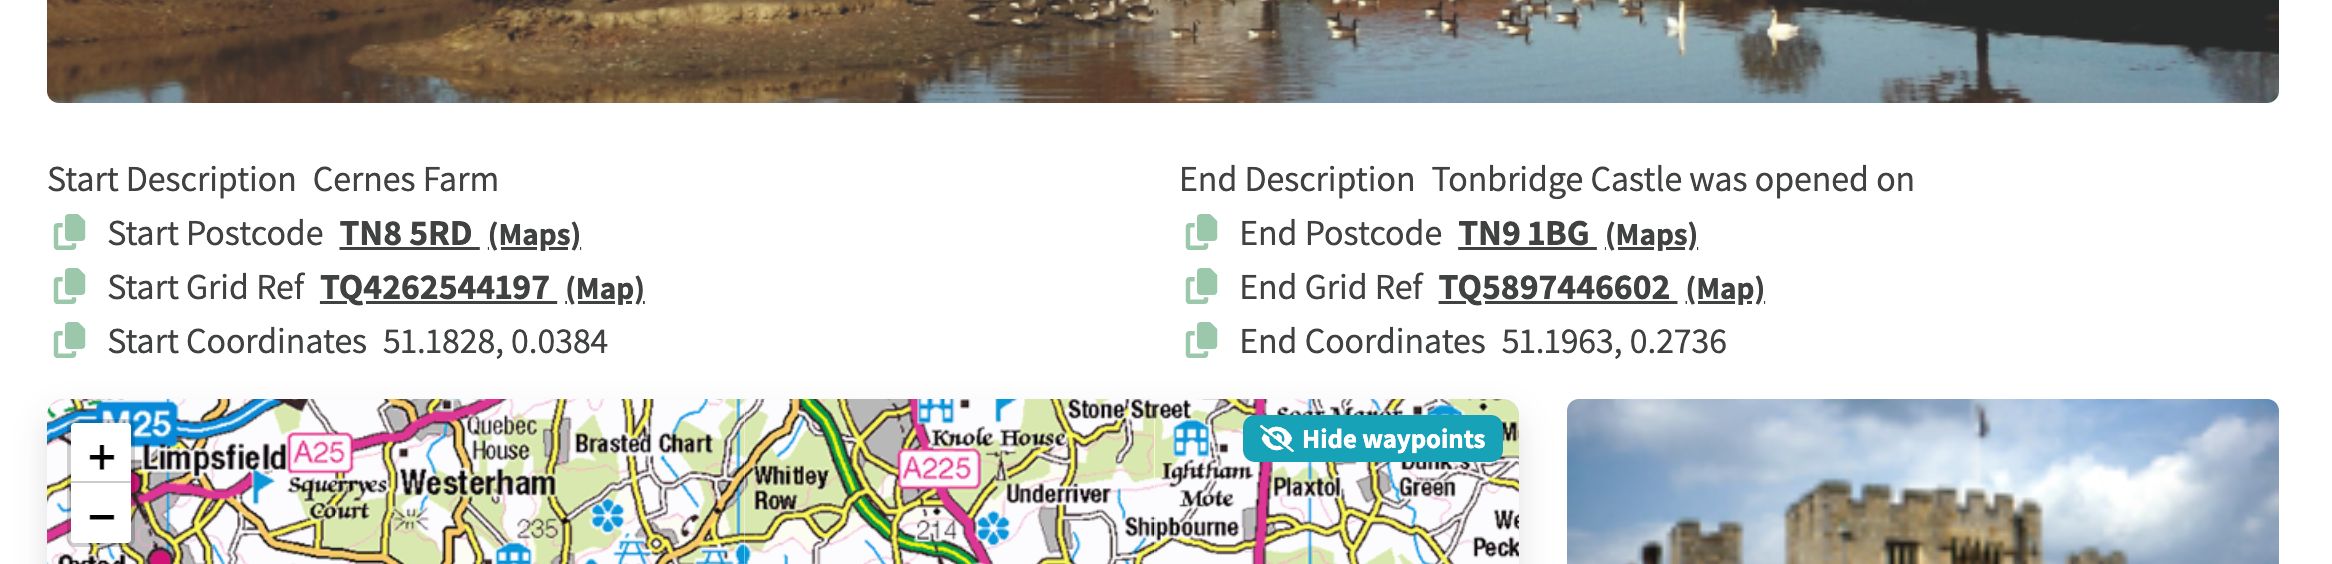
- Any page with a location row can appear as a pin on a map when that page is listed in an index row that includes a map view
When to Use Location Rows
- Add a Location row to a page when you want that page to appear in an index search results with a map
- When a page has a location row and that page is listed in an index that includes a map view, a pin will automatically appear on the map based on the location details. For example, this is how the Kent Ramblers Long Distance Paths index shows walking routes as pins on a single map.
What a Location Row Displays
Each location shows:
- Description - A human-readable place name
- Postcode - Clickable link to Google Maps
- Grid Reference - Clickable link to Grid Reference Finder
- Coordinates - Latitude and longitude
- All fields have a copy icon for easy clipboard copying
Adding a Location Row
- Open the page in the CMS editor
- Click Add Row (or the + button between existing rows)
- Select Location from the row type dropdown
- The row initialises with an empty start location
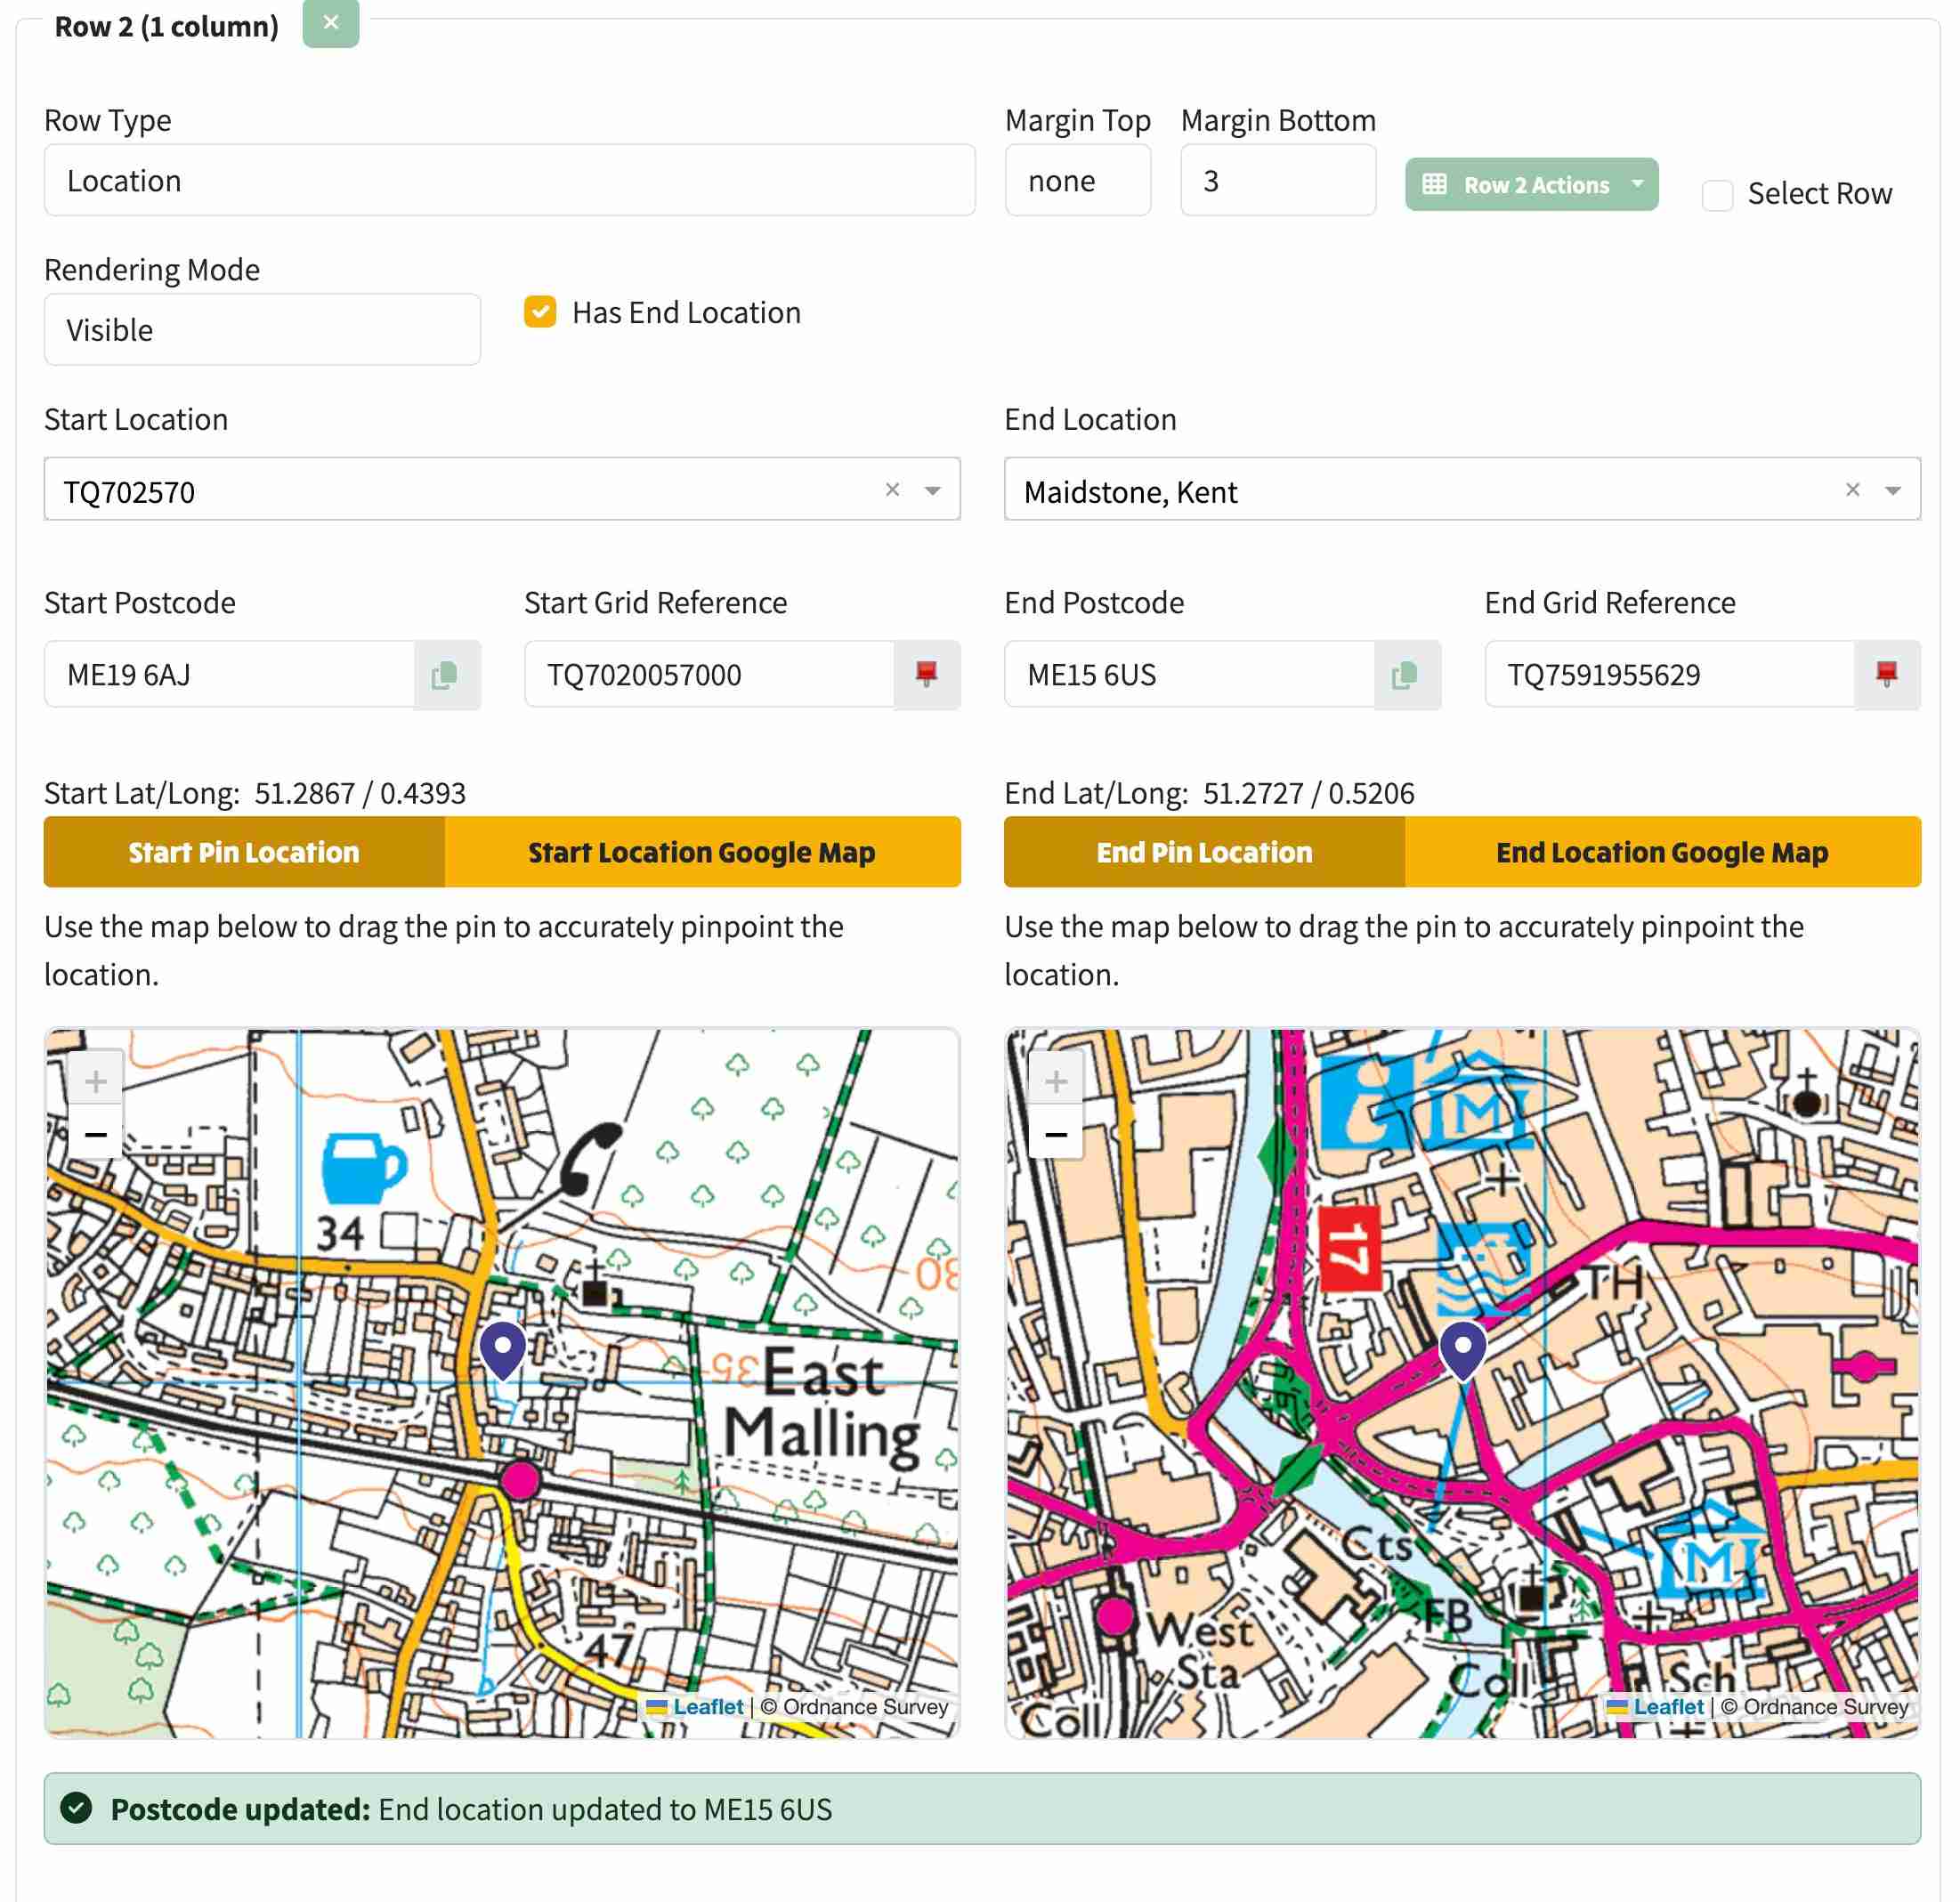
This is what a location row looks like in siite edit mode
Configuring a Location
You can enter a location using any of these methods — the system will automatically populate the other fields:
Method 1: Place Name Search
- Type a place name into the autocomplete search field
- Select from the suggestions that appear
- The system fills in postcode, grid reference, and coordinates
Method 2: Postcode Lookup
- Enter a UK postcode (e.g., TN13 1ZZ)
- The system validates the format and looks up the coordinates
- Nearby postcodes are shown in a dropdown for fine-tuning
Method 3: Grid Reference
- Enter a 10-digit grid reference (e.g., TQ8441731443)
- The system converts it to coordinates and postcode
- Click View Grid Reference to check it on Grid Reference Finder
Fine-Tuning with the Map
After entering a location, an interactive map appears where you can:
- Drag the pin to adjust the exact position
- Toggle between Google Maps preview and Leaflet editing views
- The Leaflet view supports Ordnance Survey or OpenStreetMap tiles
Adding an End Location
For linear walks where the finish point differs from the start:
- Tick the Has End Location checkbox
- A second location editor appears
- Configure the end location using any of the methods above
- The page will display both locations side by side
Visibility Control
The Rendering Mode dropdown controls whether the location is shown on the page:
- Visible - Location details are displayed (default)
- Hidden - Location data is stored but not shown to visitors (useful for internal reference or when you only want the pin to appear on index maps)
Tips
- Location rows work well paired with Map rows — the map row can automatically sync markers from the location row on the same page
- For circular walks, you only need a start location (no end location needed)
- The grid reference, postcode, and coordinates all stay in sync — changing one updates the others
- You can browse and manage all pages including their location data from the Page Content Navigator