Cropping And Resizing Images
When you add new images to an album, metadata can be added to improve the appearance or information about each image. Images can also be cropped to make them appear with the best positioning or alignment, or resized in order to appear faster on the screen. Finally, images within albums can be navigated to based on their tags. This article explains how to apply all of these features to your images.
Cropping Images
- When an image is initially added to an album, it is displayed uncropped, at the full original size, without any image title or tags as shown below:
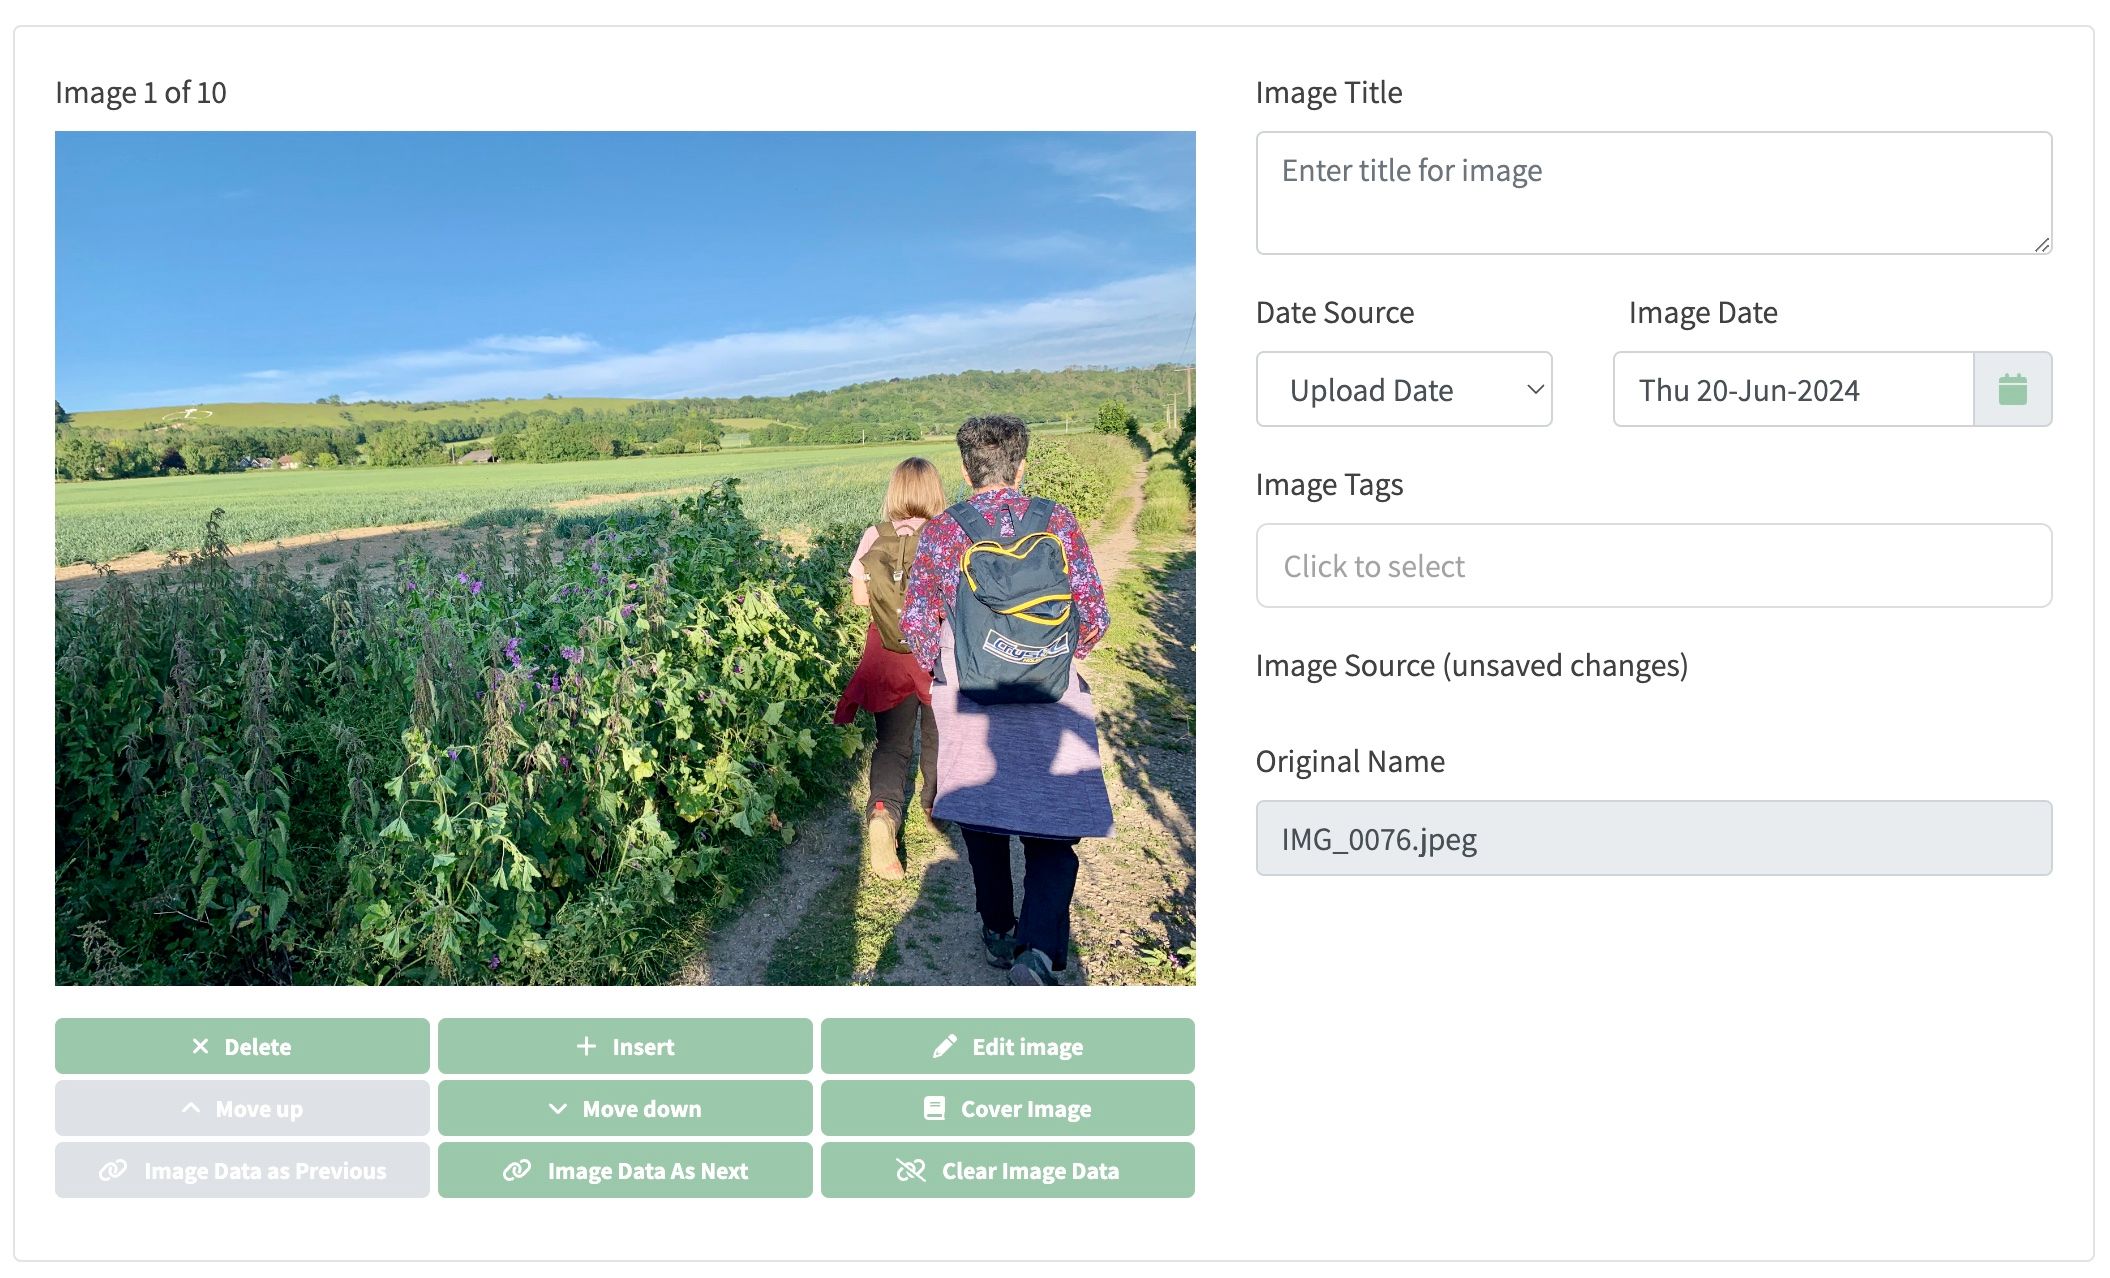
- Cropping is intentionally not done at the point the image is added to the album because the best crop zone position on the image cannot be done automatically. It needs to be chosen by you so it appears correctly.
- If your album has been configured to have a default aspect ratio so that all images fit a certain width and height, it's likely that your image will need to be cropped. If this is the case, then you do this by clicking on Edit Image button on the right directly below the image.
- After you've gone into edit mode for the image, an additional image editing window, appears above the current image as shown below:
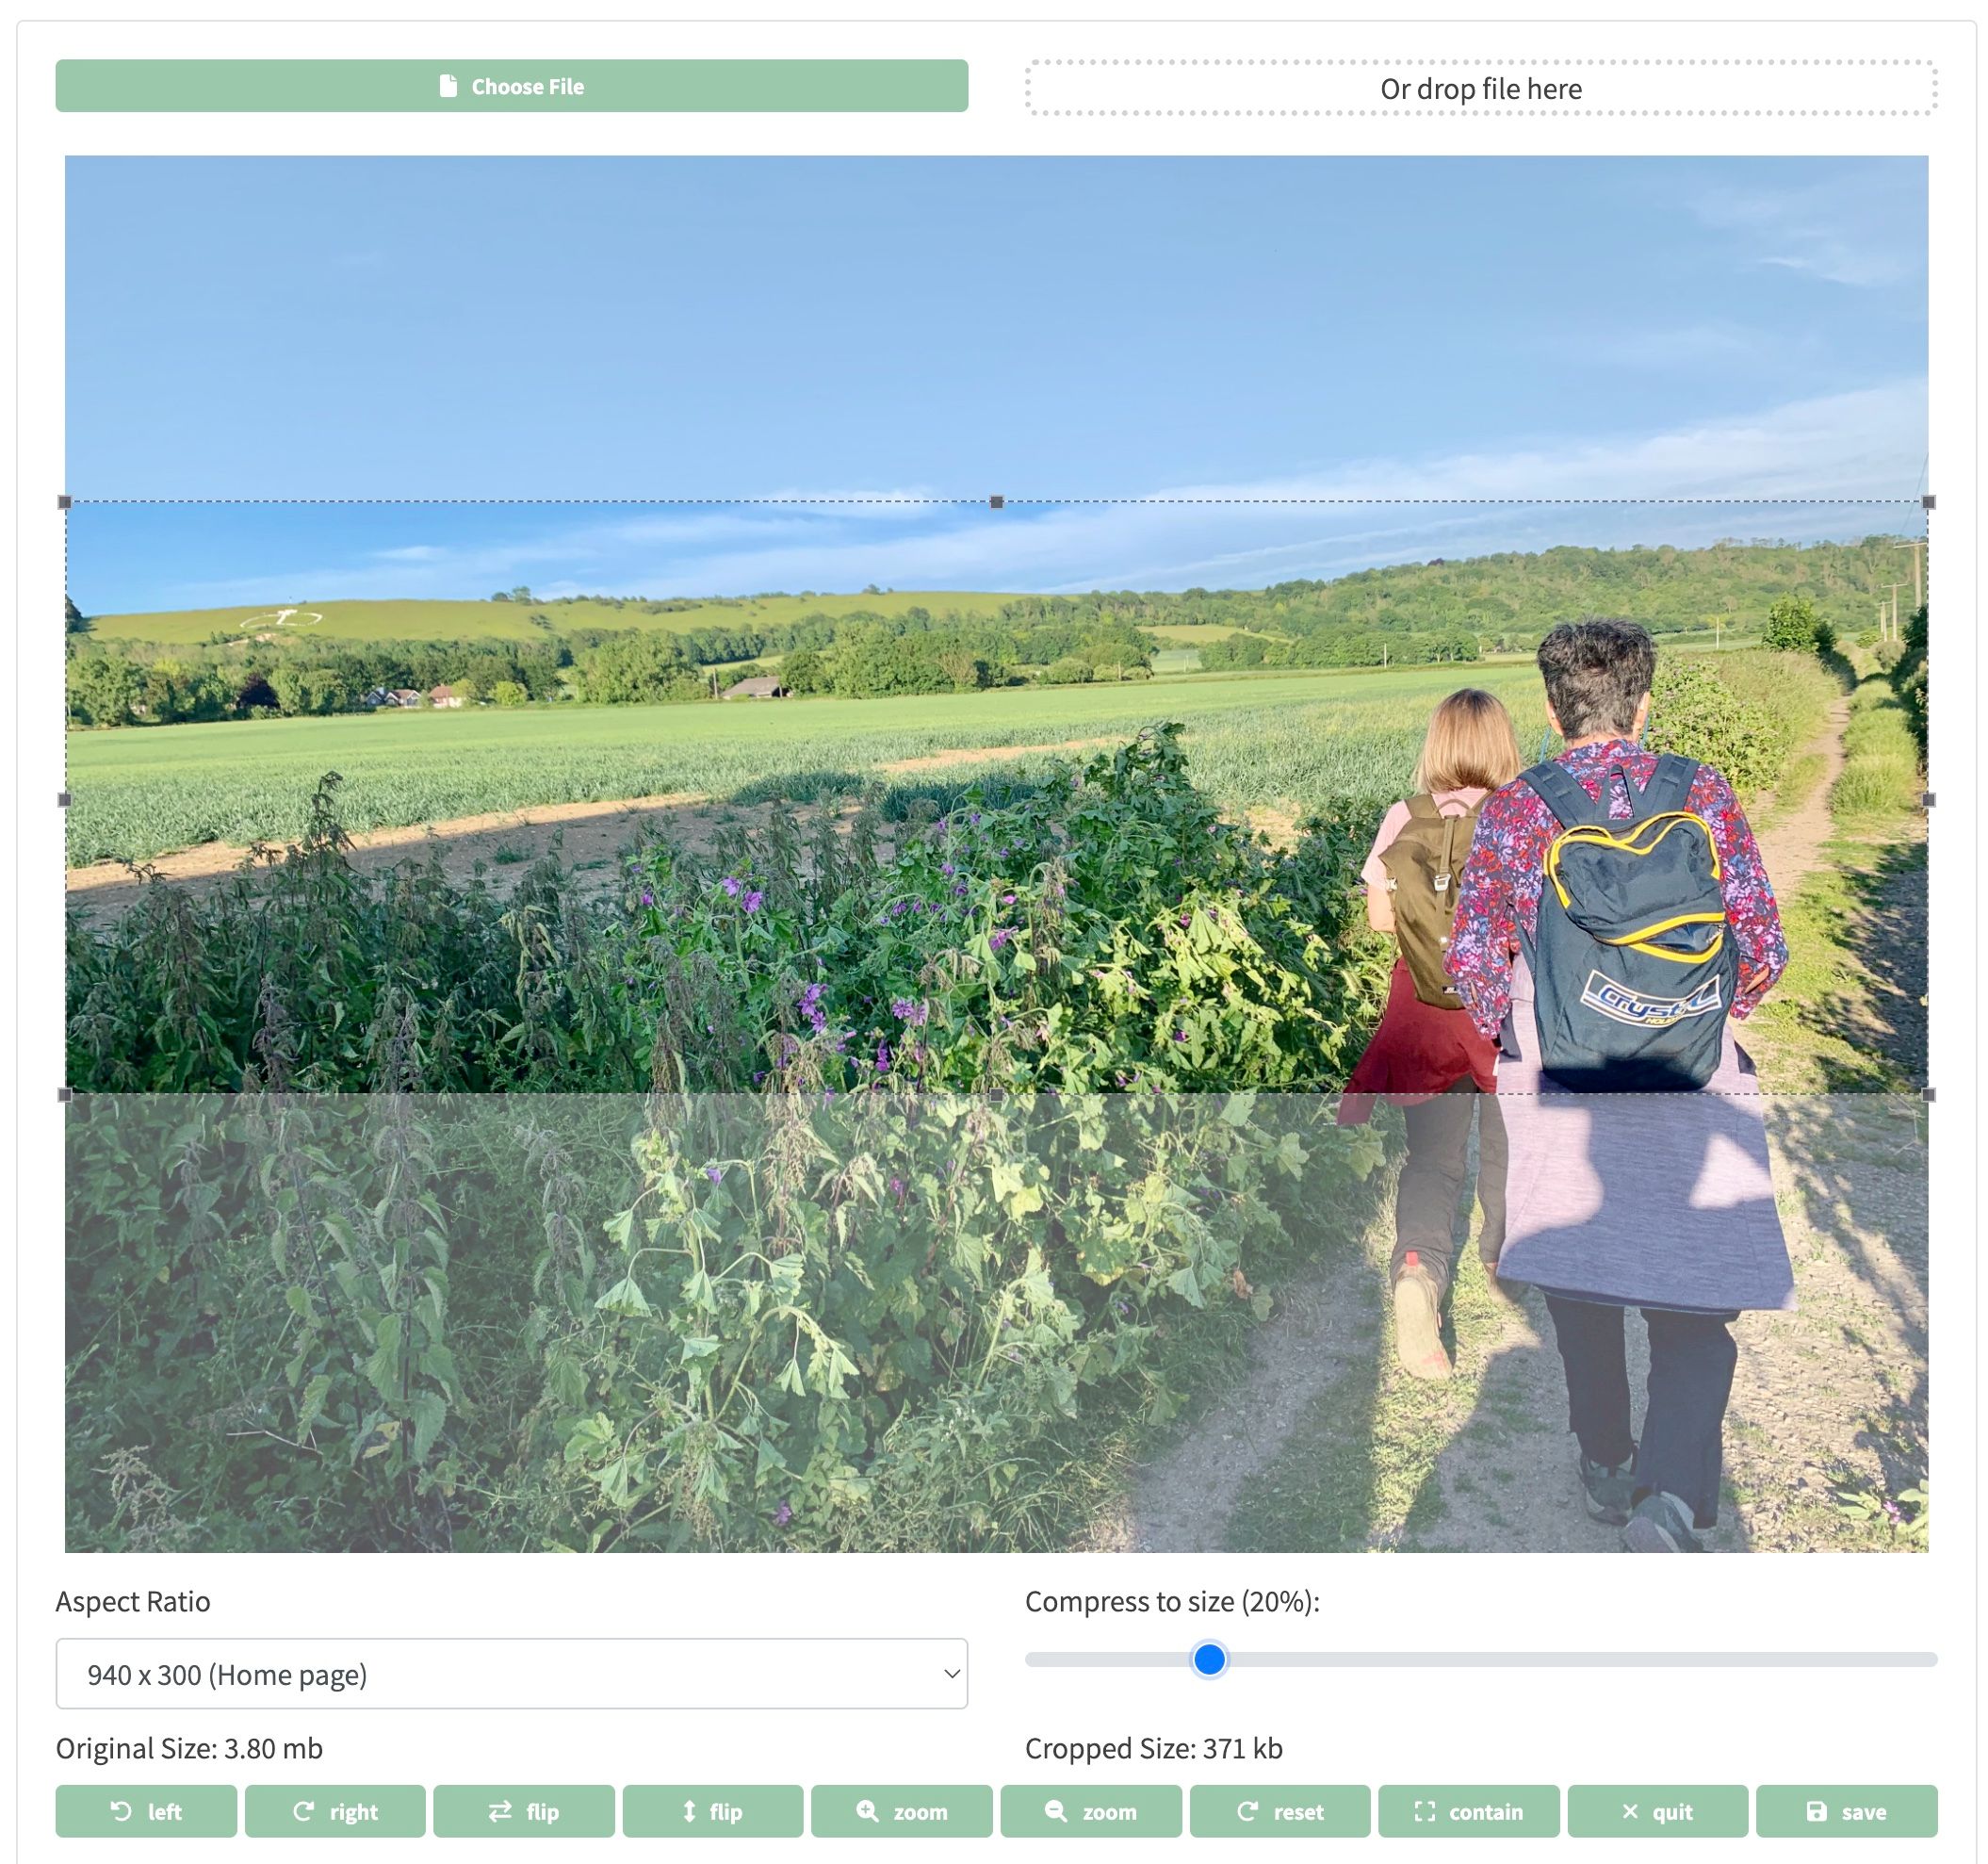
- If your album has a default aspect ratio e.g. 940 x 300 (Home page) as shown above, the image will appear with cropping/sizing handles automatically applied to the image. If there is no default aspect ratio for your album, you can manually drag a crop zone over the image with your mouse by clicking at the top left hand side where you want the crop zone to start, and dragging down to the bottom right hand corner.
- Once you have a crop zone defined, if you now click in the middle of it, you can drag this up and down until it covers the area of the image that you want displayed in the final album.
Resizing Images
- Once you are happy with the crop zone, you can then decide whether the image needs resizing which can also be done at this point. In the screenshot above, below the image on the right there is a Compress to size slider.
- The Original Size and Cropped size are also shown for reference below the slider.
- The Original Size of the image is 3.80 mb which is very large for an image that appears in an album. The user will have to download this much data before the image can be displayed in the album, so the album may take a long time to display. For good website performance, it's a good idea to aim for no more than 400Kb for each image. In the example screenshot above, the size has been reduced down to 20% in order to achieve a cropped size of 371kb which is within the recommended range.
- The more you drag the slider to the left, the more the image size will be compressed and its size will be reduced. However, there is a disadvantage to reducing an image size, as the quality can also be reduced.
- Experiment with the compression setting by dragging the slider from right to left. You will be able to see in real-time how the file size is affected and you can also preview the resultant image appearance below the editor.
- If you see pixelation or an unpleasant reduction in colour depth in the preview, you have probably reduced the size by too much.
- Don't worry about experimenting with extreme settings at this point, as changes are only made to the image later on when you save the whole album.
- Once you are happy with your cropping and/or resizing, click save to apply your changes and the popup editor will disappear.
- If you are not happy with your cropping or resizing, click the quit button and any changes you have made will be lost and the original uploaded image will still be available for further changes.
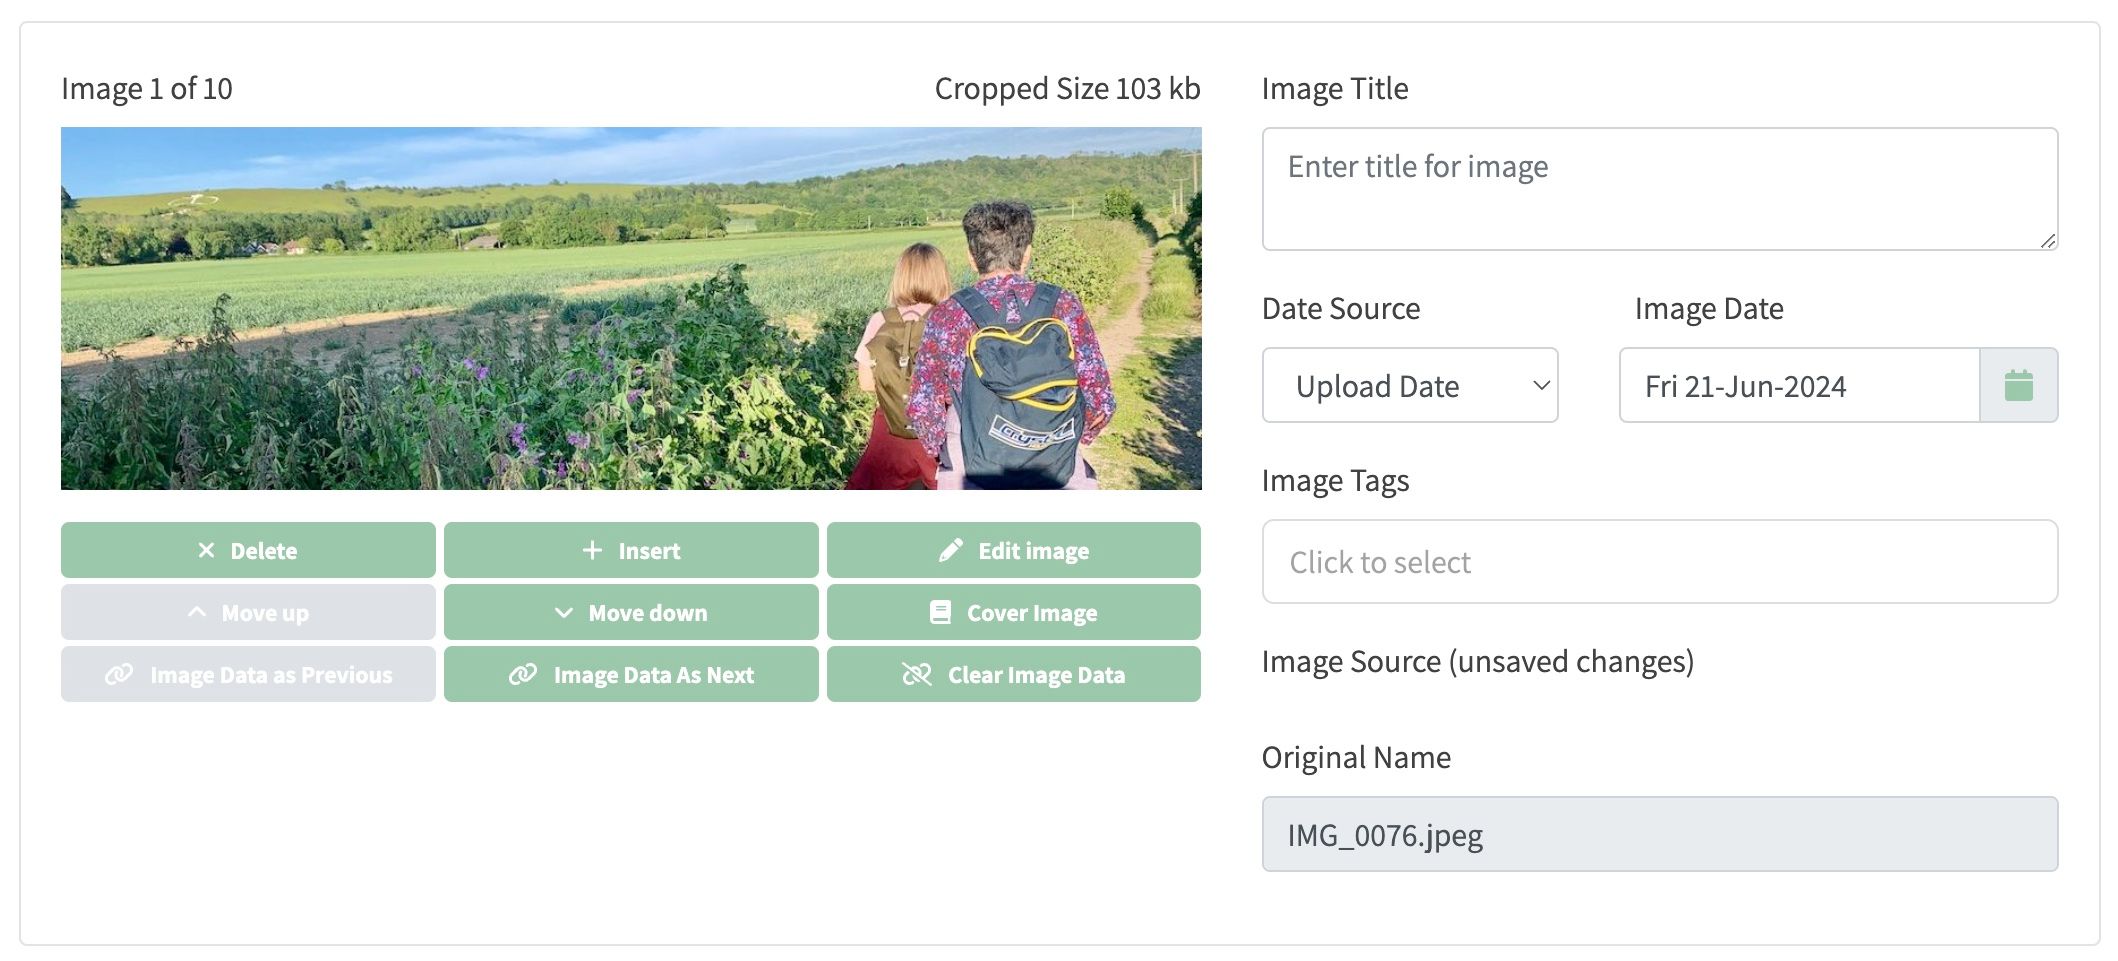
- The image below shows the image in its now cropped and resized form:
Adding Event Links to Images
- In the above image, you can see a Date Source field which defaults to Upload Date. which is Fri 21-Jun-2024. This date is stored with the album and controls whether the image is displayed when the album is selected to show Recent Photos.
- However, you can change the Date Source by creating a link to an event. When you do this, the date of the event is used instead.
- But even more importantly, when an event link is created, the image will show a link that a user can click on to provide information about which walk or social event it relates to which is very informative and helpful, as it helps cross-reference images to events for your group.
- If you want to create a link from an image to one of your group events, chose a Walk, Social Event or Committee Event from the Date source dropdown.
- You will now see some additional fields displayed below the image - a From/ To date range and a Link to Walk dropdown (or whichever Date Source you selected in the step before).
- If you now click in this dropdown, events will be automatically be populated that fall within the date range. See the screenshot below to see how this appears:
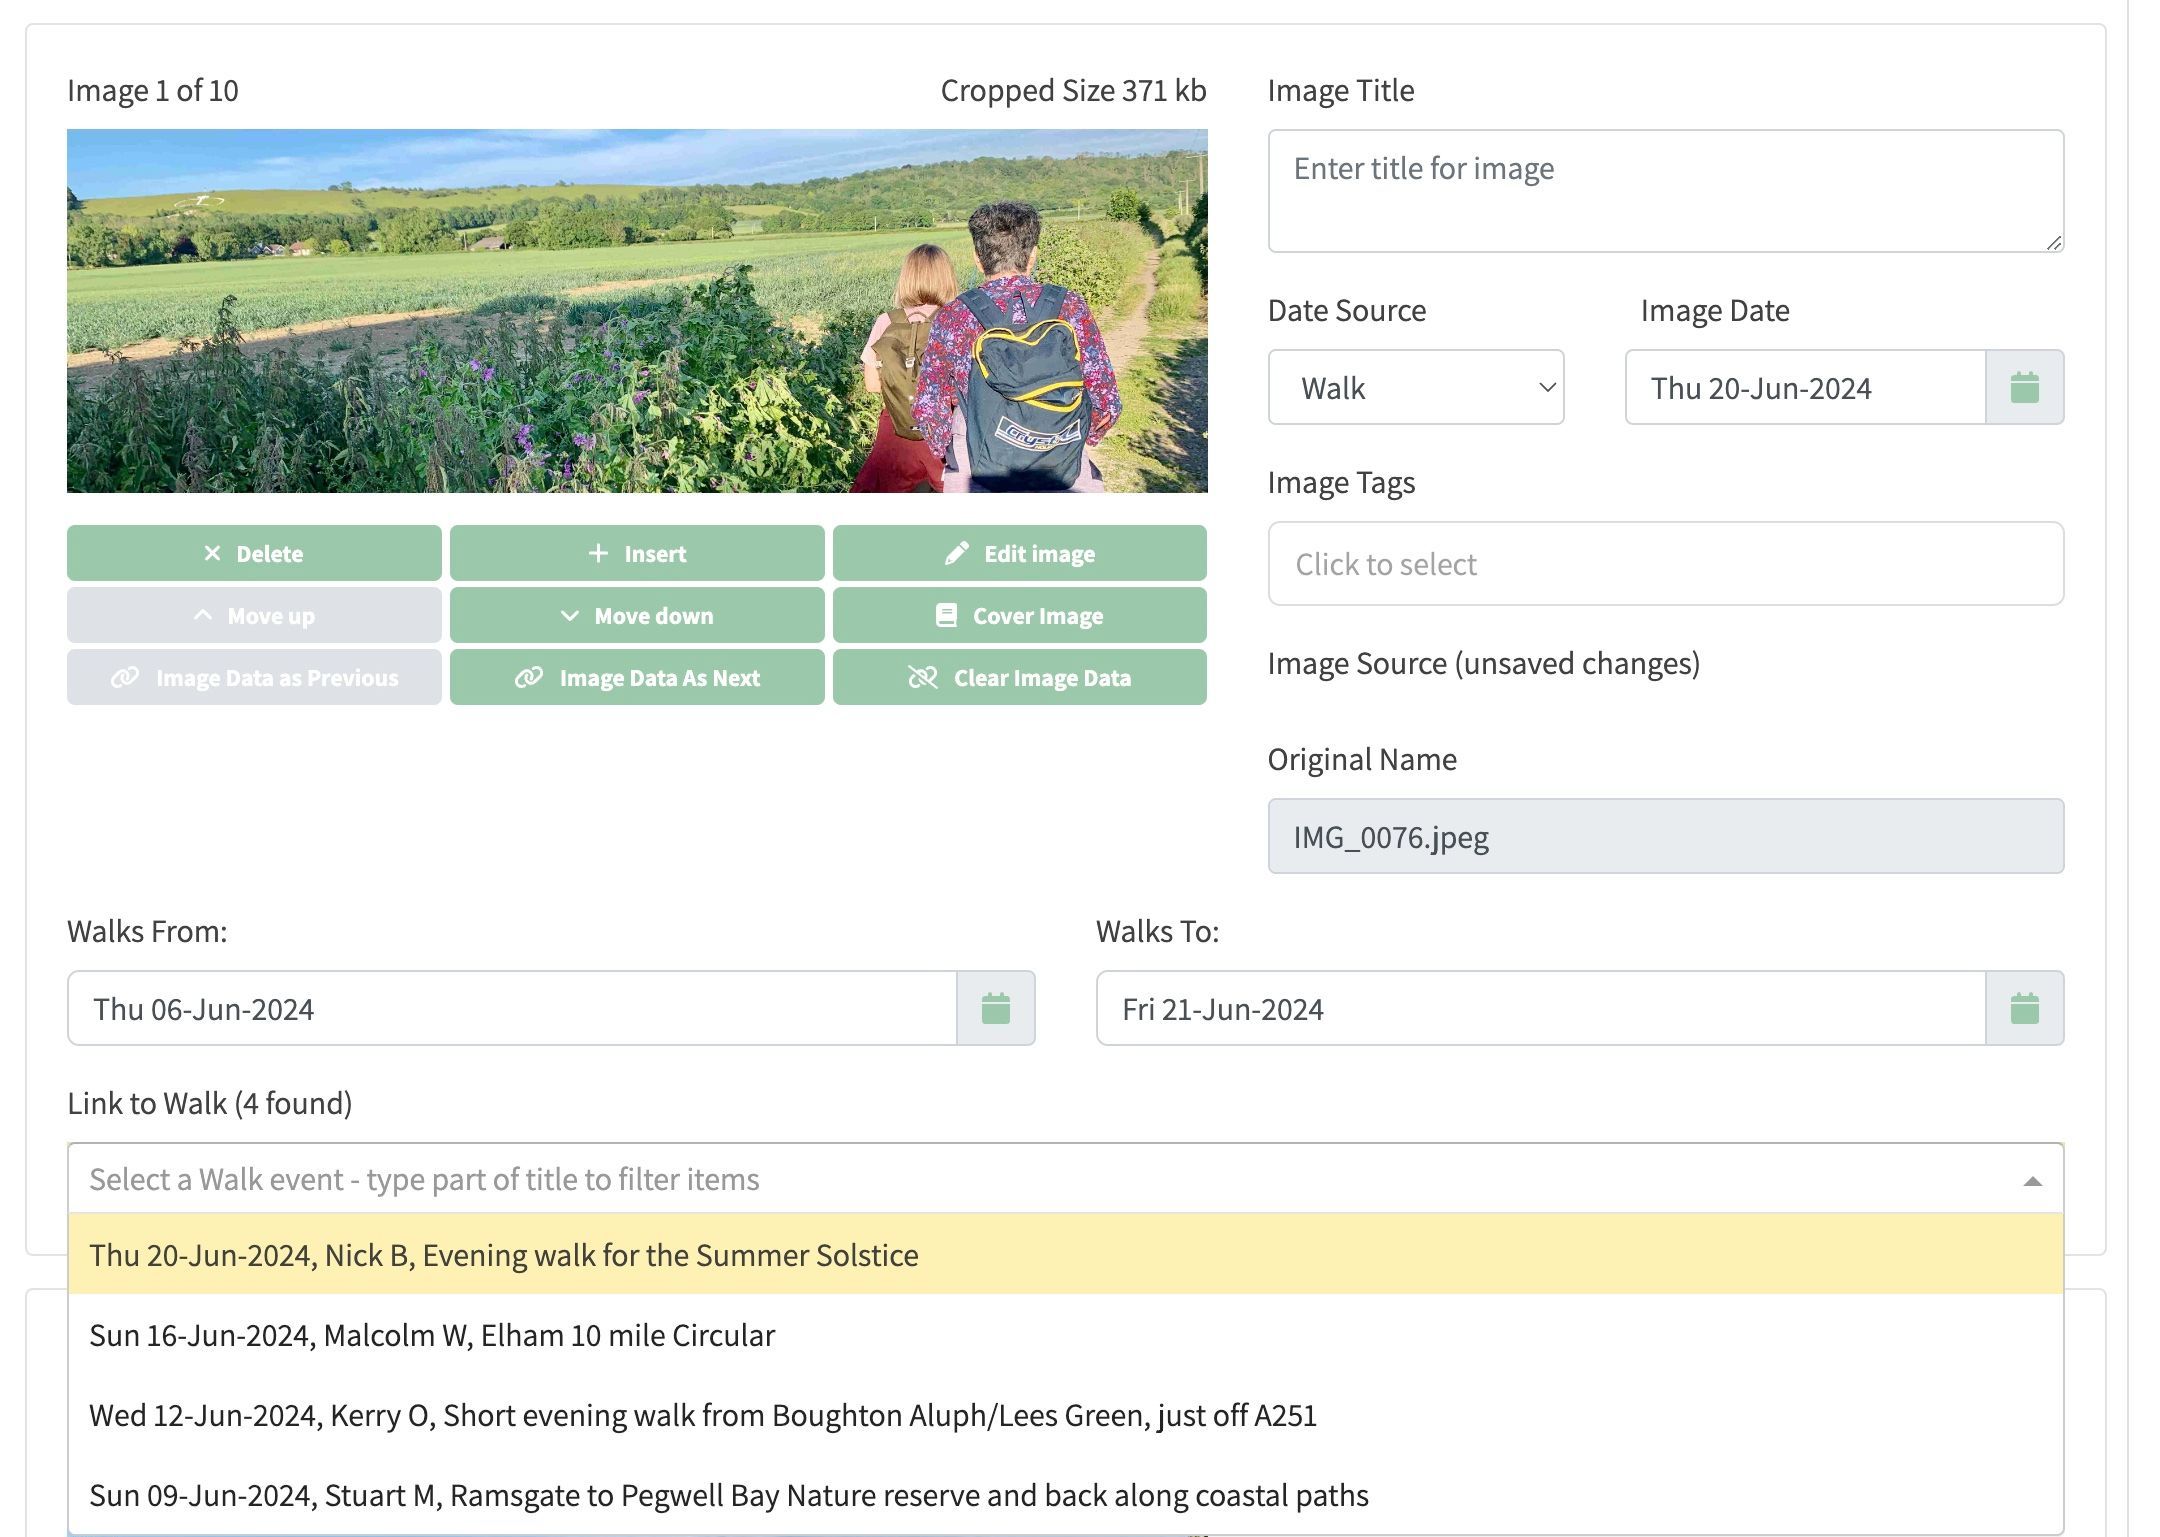
- When you find the event that is relavant for the image click it and the image metadata is updated:
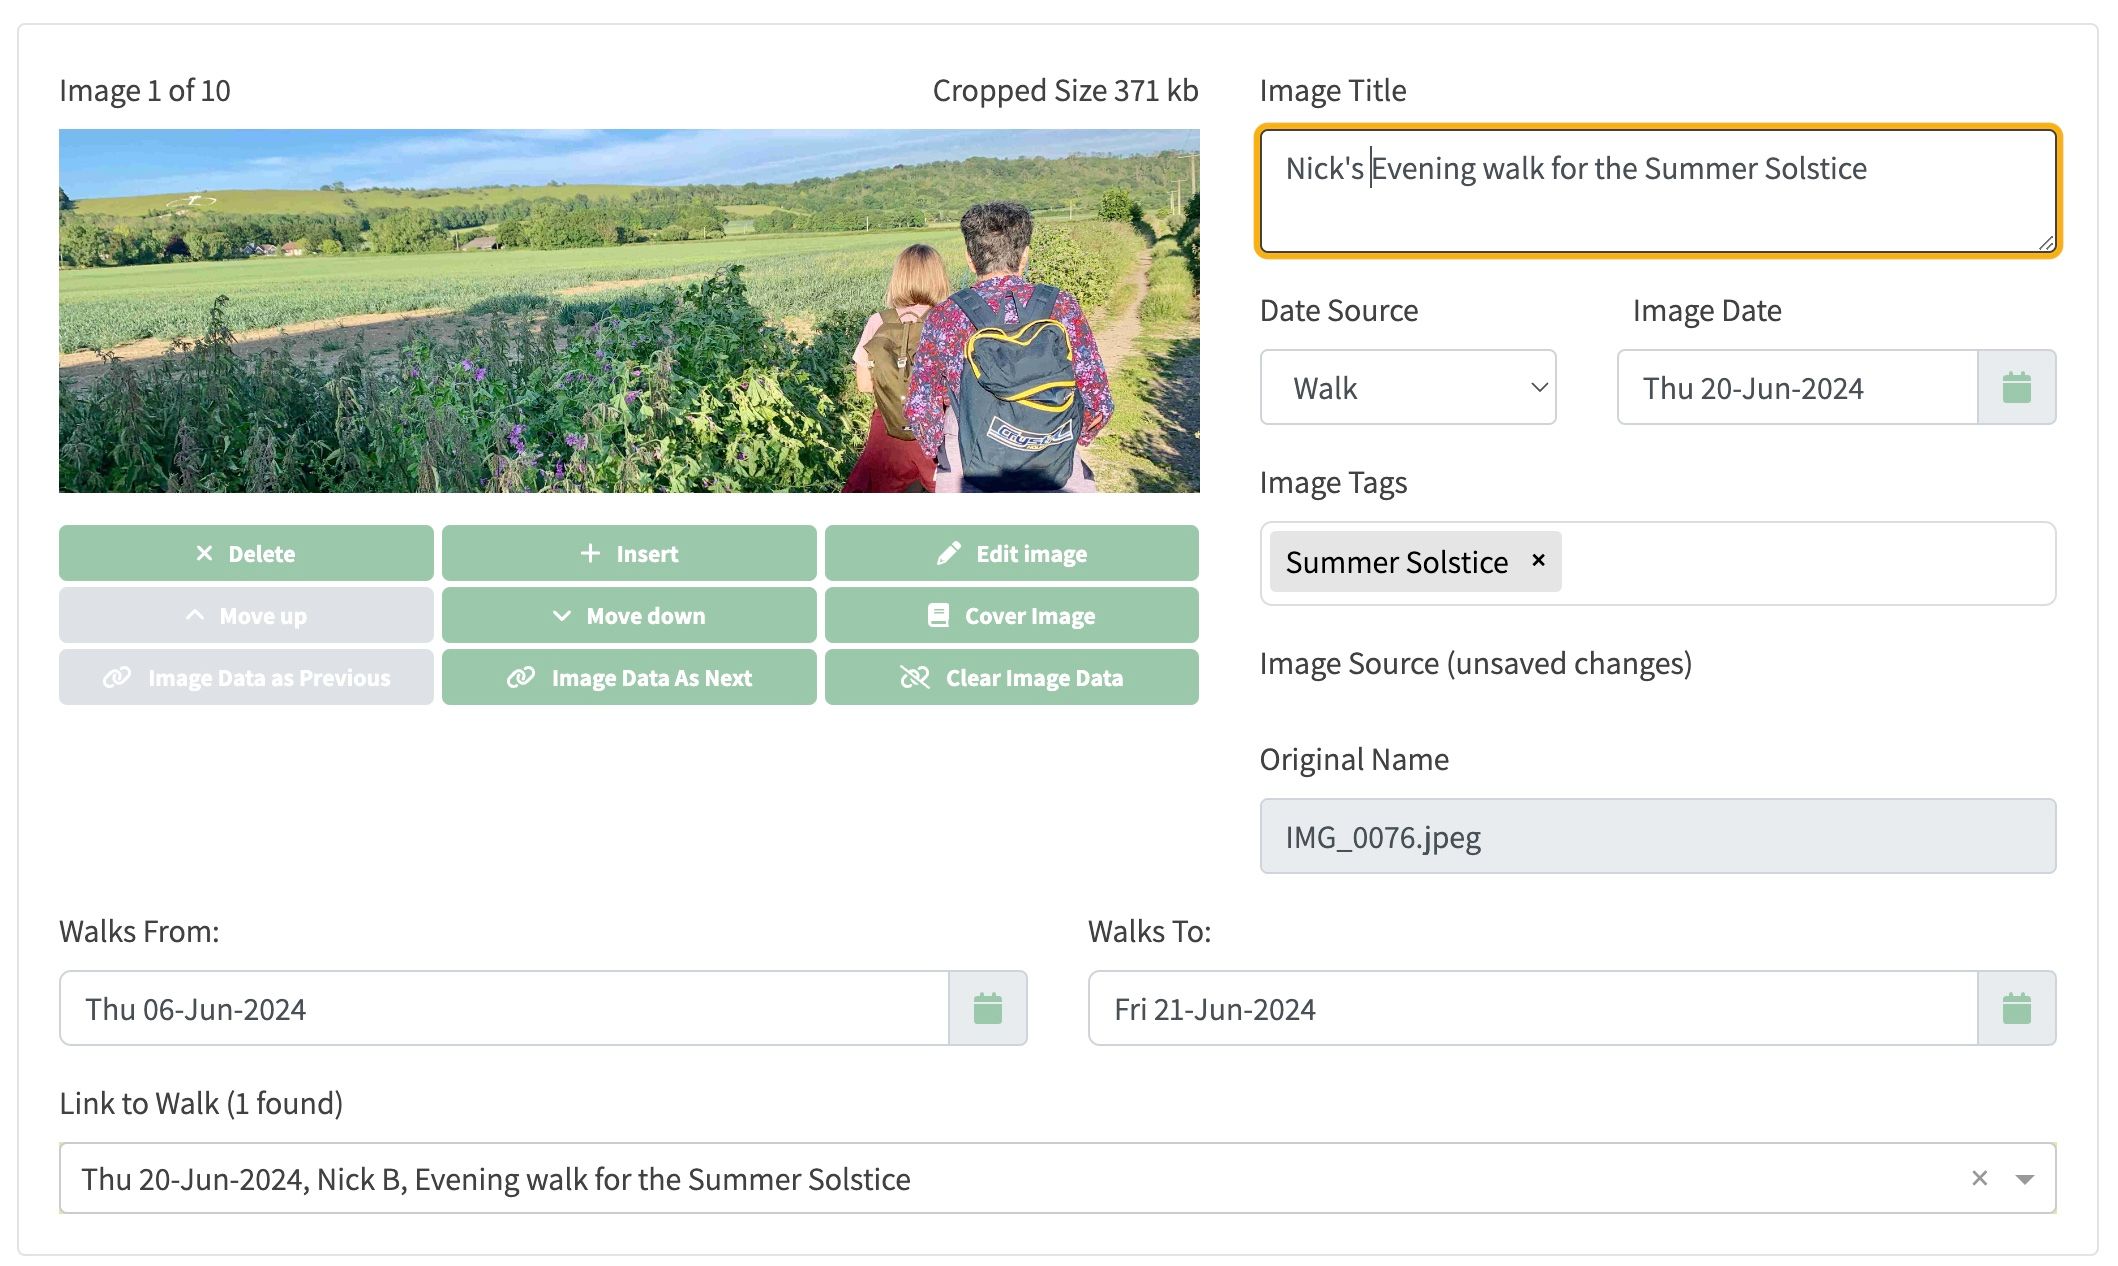
- The Image Date reflects the date of the event.
- The Image Title reflects the title of the event.
- In the screenshot below you can see that the Image Title can be further updated to reflect exactly what you want to be displayed in the final album.
Adding Tags to Images
- At this point you can also add one of more tags to to your image. In the above screenshot we have added a tag Summer Solstice
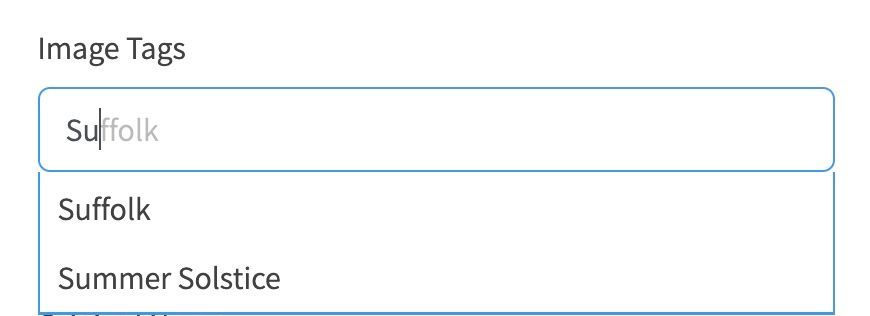
- If you want to do this, just click in the Image Tags field and you will be prompted with a list of existing tage that have been created.
- If you want to add a new one that doesn't exist, just type it and press enter as shown in the screenshot to the right:
- The new tag will then be added to the album metadata and be selectable for future images in that album.
Copying Image Data
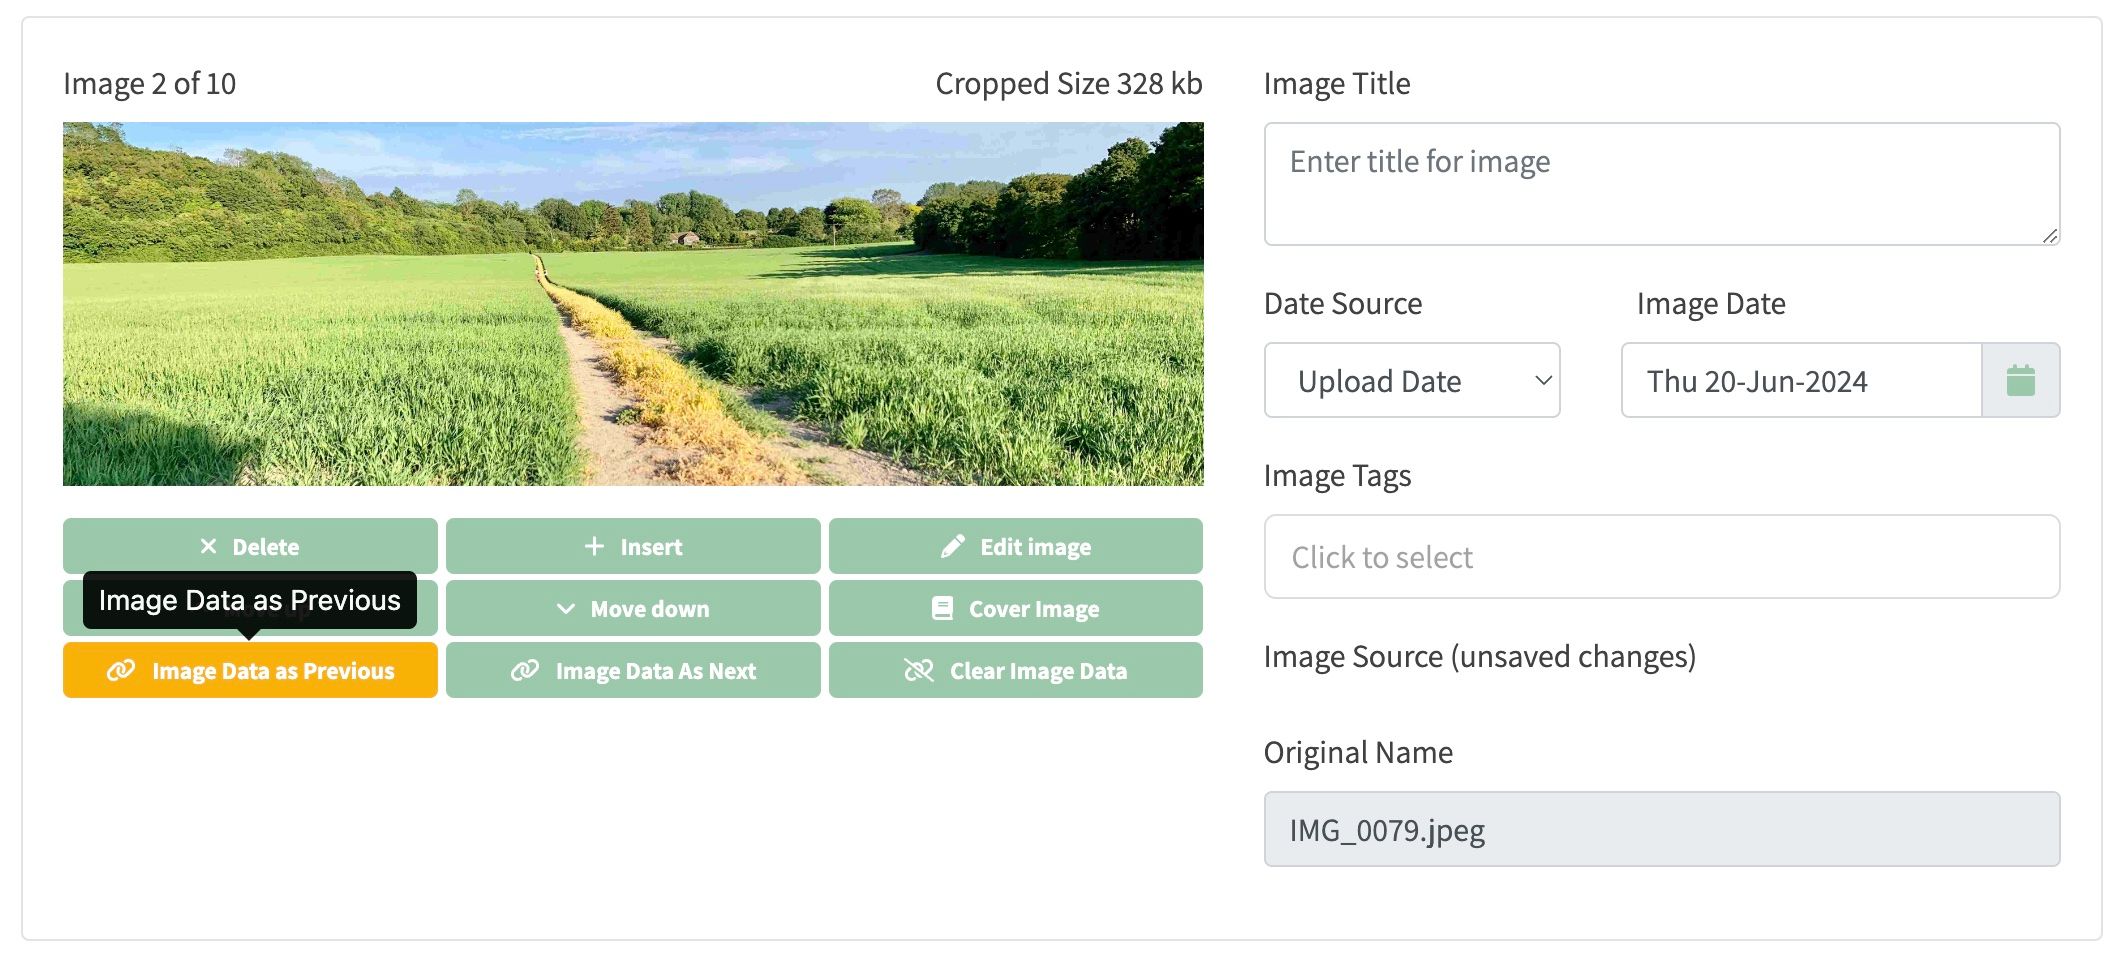
In this article we have set Image Title, Tag and added an event link to a single image. But there may be several images that you have just added to an album and you want the same image data applied to all of them. If this is the case, there are some useful buttons that you can use to copy this data.
- Click Image Data as Previous to copy data from the previous image to the current image.
- Click Image Data as Next to copy data from the next image to the current image.
Saving Data to the album
- To recap, in this article we have performed Cropping and Resizing of an image, added an Event Link, updated an Image Title, and added an Image Tag. However none of this data is saved permanently to the website until the album is saved.
- To do this, click either of the following buttons that can be found on the row of buttons at the top of the album:

- Save changes and exit to save album data, and return to the previous screen.
- Save to save album data, but leave the album in edit mode on the current view so you can make further changes if you wish.
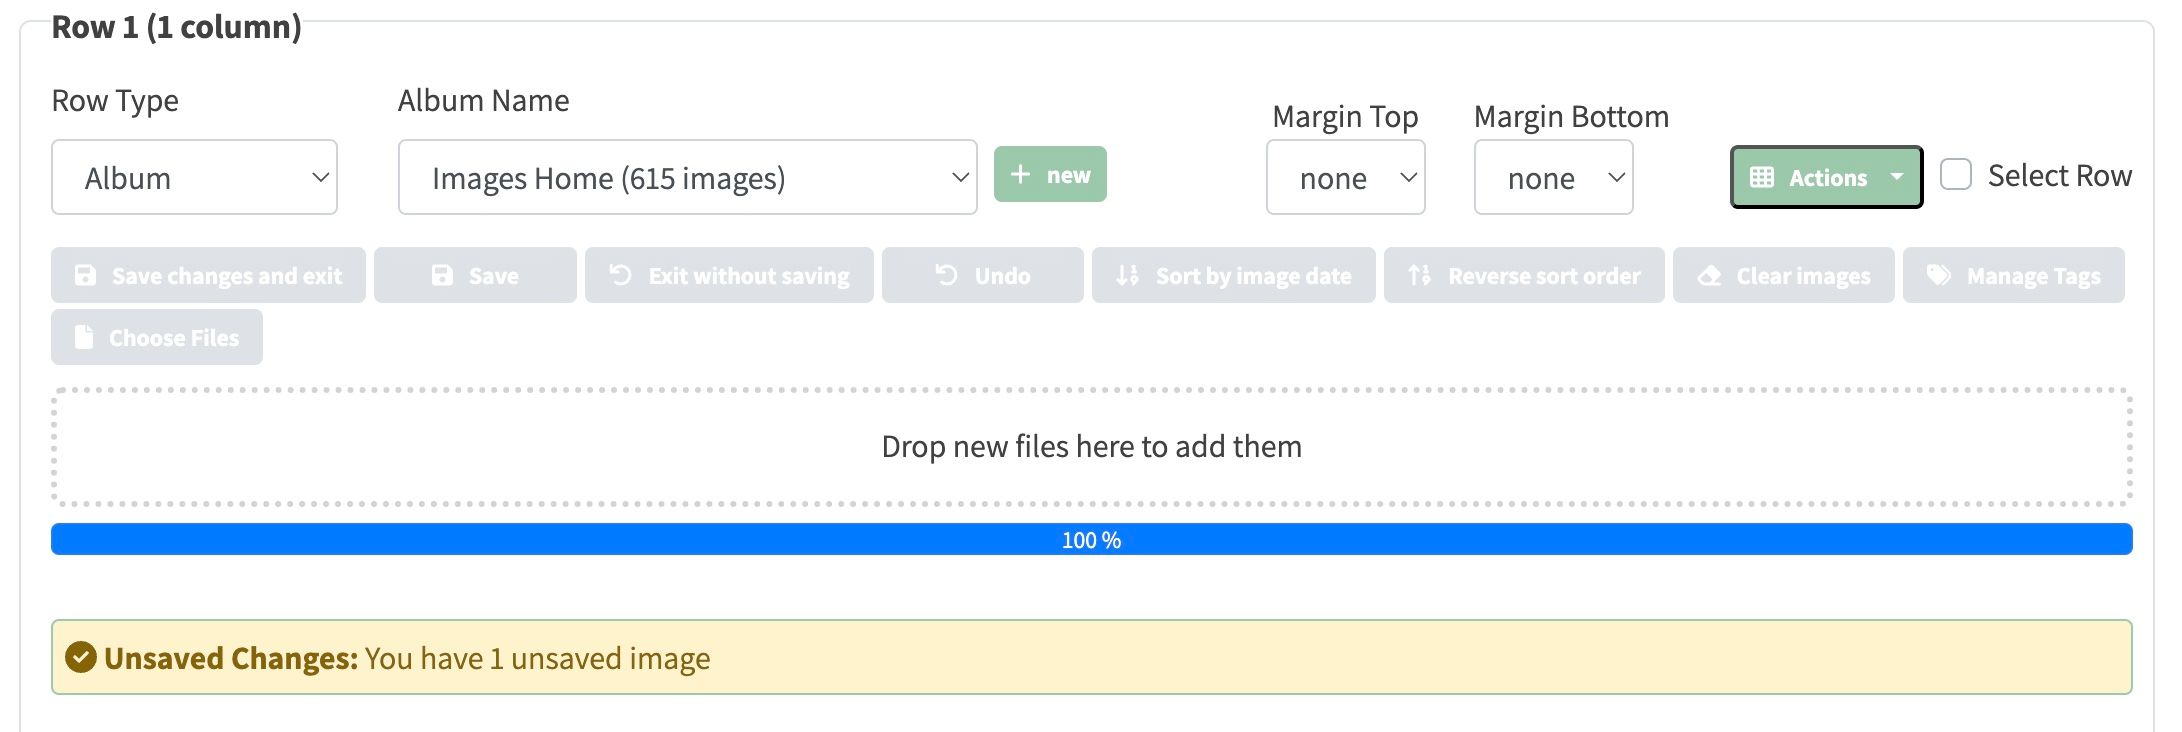
- When you chose one of the above save operations, you will see a progress bar as follows:
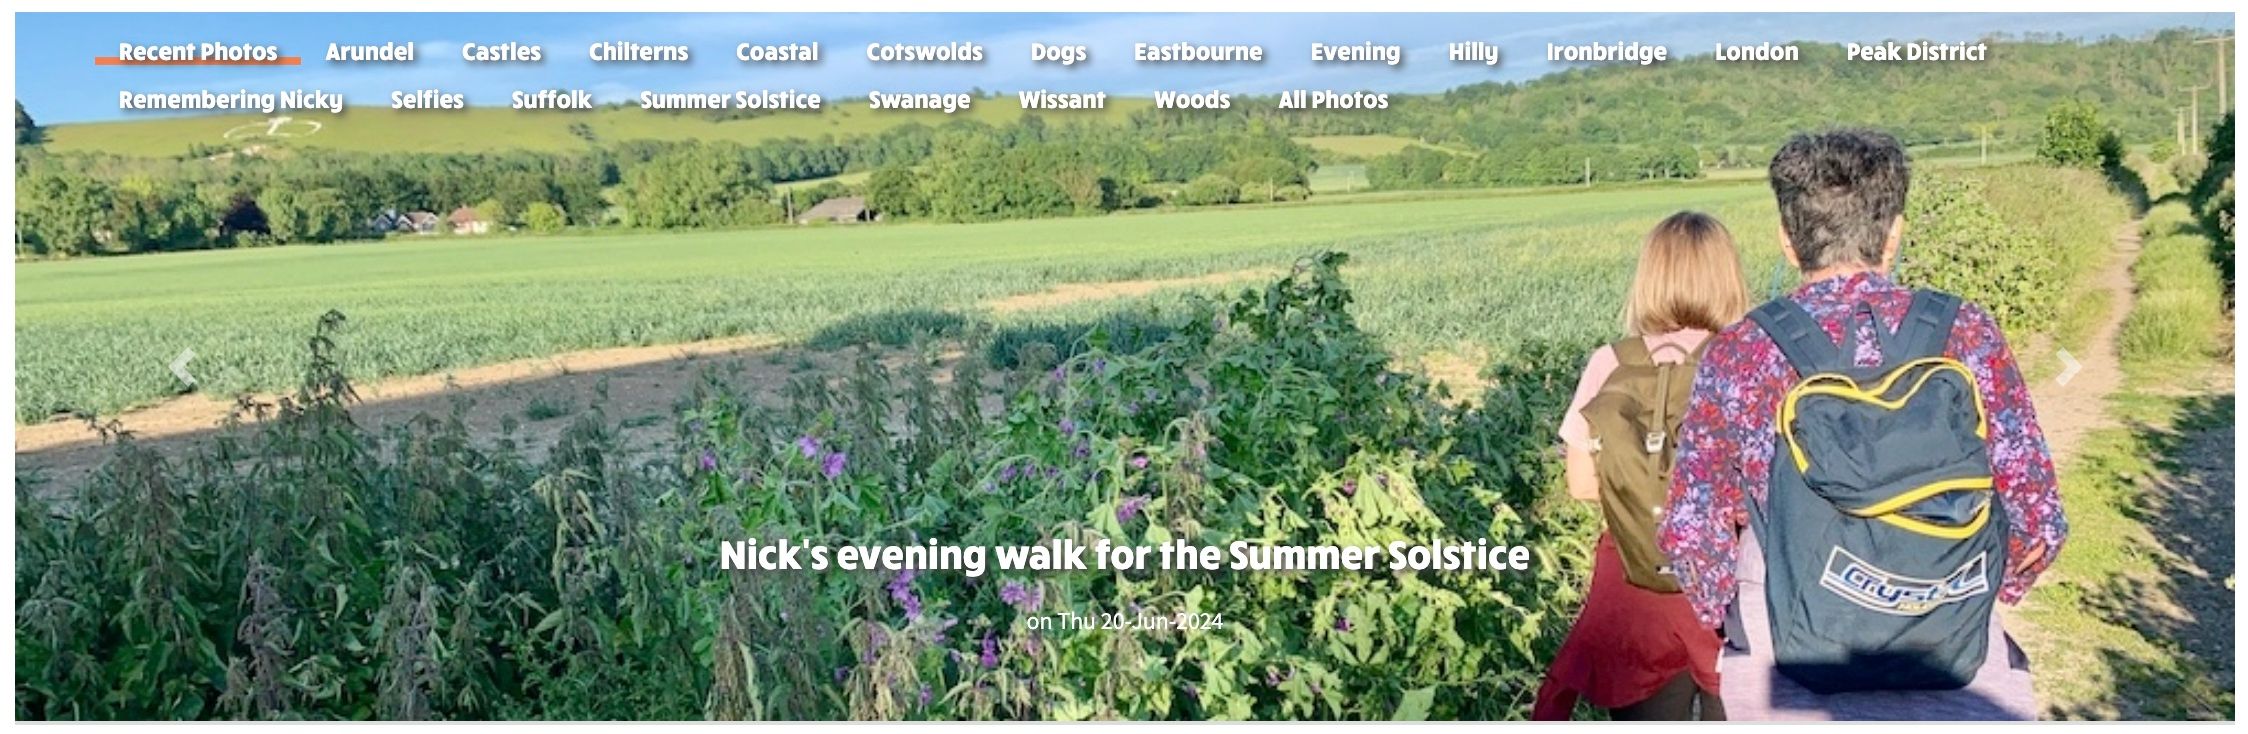
- When you view the album you will now see the newly added images rendered with their new metadata: