Editing Images in a Gallery
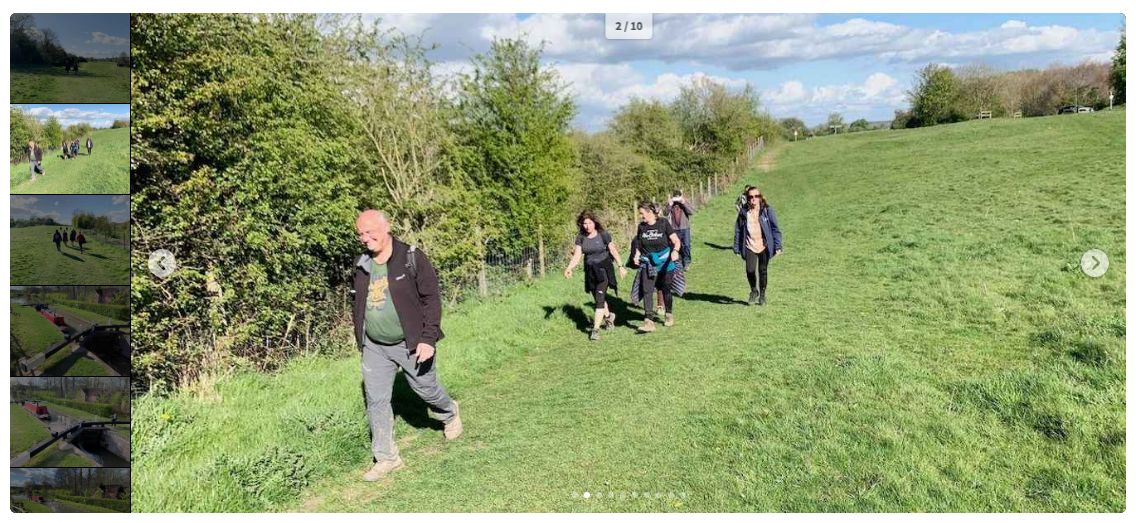
Gallery is one of the four Album views available - the others are Carousel, Grid and Backgrounds. Gallery view shows a single large image with a strip of thumbnails alongside it (left by default, but the strip can be moved to any of the four sides). It is the view to choose when visitors are expected to step through a curated photo set in sequence - weekend-away days, social event write-ups, or any page where each image has something to say on its own. Above is an example of the Gallery view in use on a weekend-away day page.
Compared to the Grid, which spreads every image out at once, the Gallery view keeps the focus on one image at a time and uses the thumbnails as a way to jump around without scrolling. Compared to the Carousel, it doesn't auto-advance and doesn't group images into stories - it just works through the album in order.
Going into Edit Mode
- You need to be logged into the site as an administrator. If you haven't done that yet, follow this guide.
- Visit the page that contains the gallery album.
- Toggle edit site from the website header. The page content will go into edit mode and the Album Settings tab opens at the top of the album row as shown below:
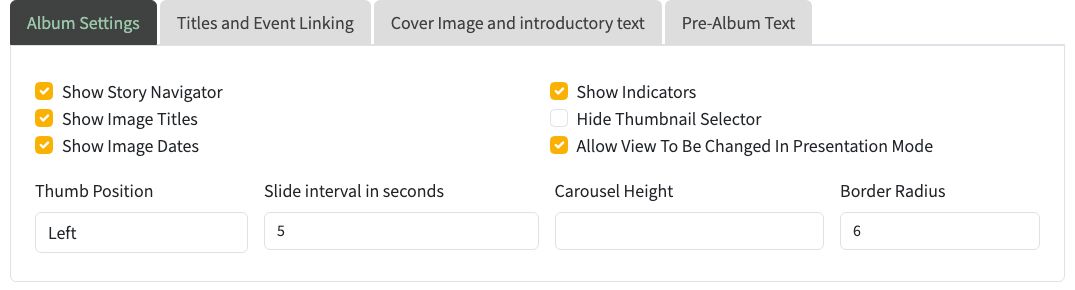
Album Settings tab when the album is configured as a Gallery
The configuration options on the Album Settings tab that most directly affect a gallery are:
- Hide Thumbnail Selector - tick to hide the thumbnail strip entirely, leaving only the large image and the next/previous navigation. Useful when the thumbnails would be distracting.
- Thumb Position - where the thumbnail strip appears relative to the main image. Choose Top, Left, Right or Bottom.
- Slide interval in seconds - if you want the gallery to auto-advance, set a non-zero number of seconds between slides. Leave at zero for manual-only navigation.
- Show Image Titles and Show Image Dates - if on, each image's title and date appear over or beside the main image so visitors know what they are looking at.
- Show Story Navigator - if your album is organised into stories, the story links are shown along the top of the gallery so visitors can jump straight to a particular section.
- Allow View To Be Changed In Presentation Mode - if on, visitors see a small toolbar at the top of the album letting them switch between Gallery, Grid, Carousel and Backgrounds views without leaving the page. Shown in the live example at the top of this page.
Switching An Existing Album To Gallery
- Go into edit site mode.
- Scroll to the album row. Above the preview there is a small toolbar with four icons - backgrounds, carousel, gallery, grid.
- Click the gallery icon. The preview switches to a single large image with the thumbnail strip.
- Choose a Thumb Position and, if you want, a Slide interval in seconds, then Save.
For information on the other tabs Titles and Event Linking, Cover Image and Introductory Text and Pre-Album Text see the separate page on editing album elements.