Once a walk slot has been created (see Add Walk Slots), a walk leader claims it and fills in the details across seven tabs in the walk editor. This guide walks through each tab end to end, using a live example: a Sunday slot on 26 July 2026 from the East Kent Walking Group programme.
This flow applies when your group is on Local Walk Population. If your group syncs from Ramblers Walks Manager, the walk editor is read-only and walks are pulled from that system instead.
You can check your mode in Admin > System Settings > Group / Area Configuration > Group Walk Population.
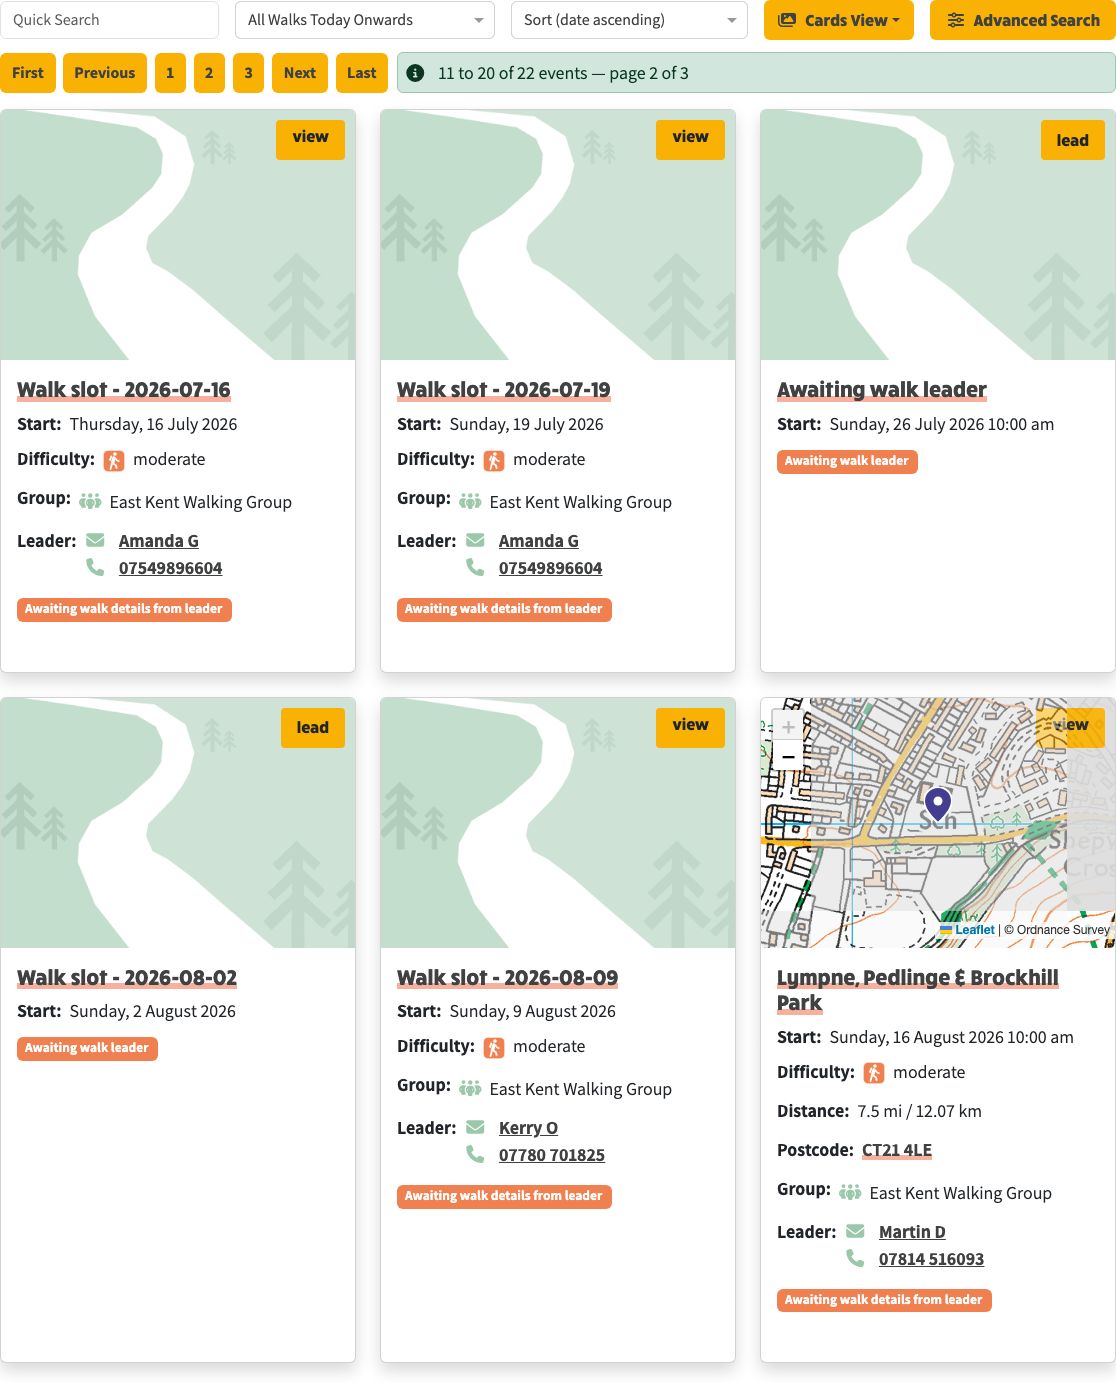
On the public walks page, every slot card shows an action button in its top-left corner. The label depends on who you are:
If your forward programme spans more than a page, use the pager at the top of the list to step through. The screenshot below shows page 2 of the EKWG programme, viewed by a logged-in regular member: the Sunday 26 July 2026 card is still awaiting a walk leader - no leader has stepped forward and no details have been entered. The card shows a lead button because it is still up for grabs.
Page 2 viewed by a logged-in member. The Sunday 26 July slot is empty and shows the lead button alongside several other unclaimed Sunday slots.
Pressing lead on the card does three things in one step:
/walks/edit/<date> with all the fields blank, ready for you to populateA green confirmation banner appears at the bottom of the editor:
Thanks for offering to lead this walk! Please complete as many details as you can, then click Save to allocate this slot on the walks programme. It will be published to the public once it's approved. If you want to release this slot again, just click Cancel.
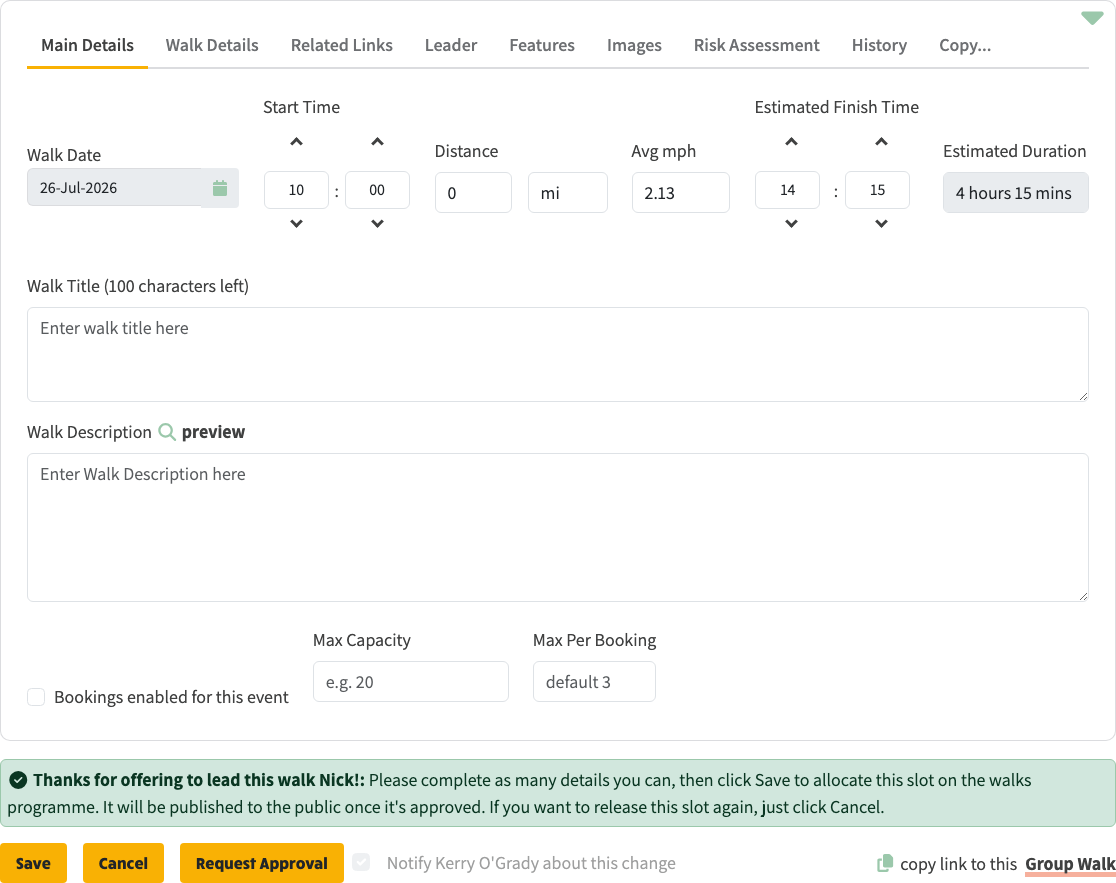
Immediately after pressing lead: Main Details opens with no walk title, no description, and the default start time. The green banner at the bottom confirms the slot is now allocated to you.
From here you fill the walk in tab by tab. Each screenshot below shows the same Denton Circular walk populated for the first time. You can save at any point and come back later - the slot stays allocated to you until you cancel or until a walks coordinator releases it.
The tabs appear in this order on screen: Main Details, Walk Details, Related Links, Leader, Features, Images, Risk Assessment, History, Copy...
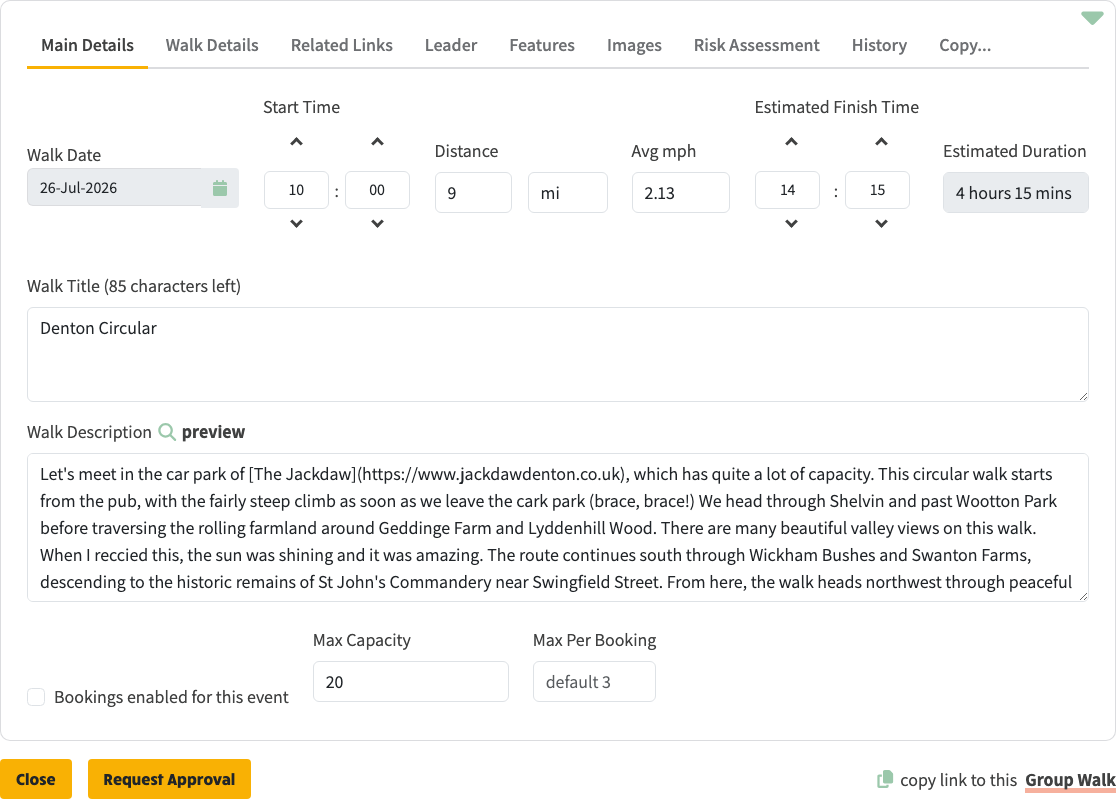
This is the headline data for the walk: start time, finish time, distance, average miles per hour, walk title, walk description, and (optionally) a maximum capacity and "max pre-booking" limit if you are running a booked walk.
The date itself is locked - it was set when the slot was created and is not editable from this screen. The "preview" link next to the description field renders the description as the public site will show it.
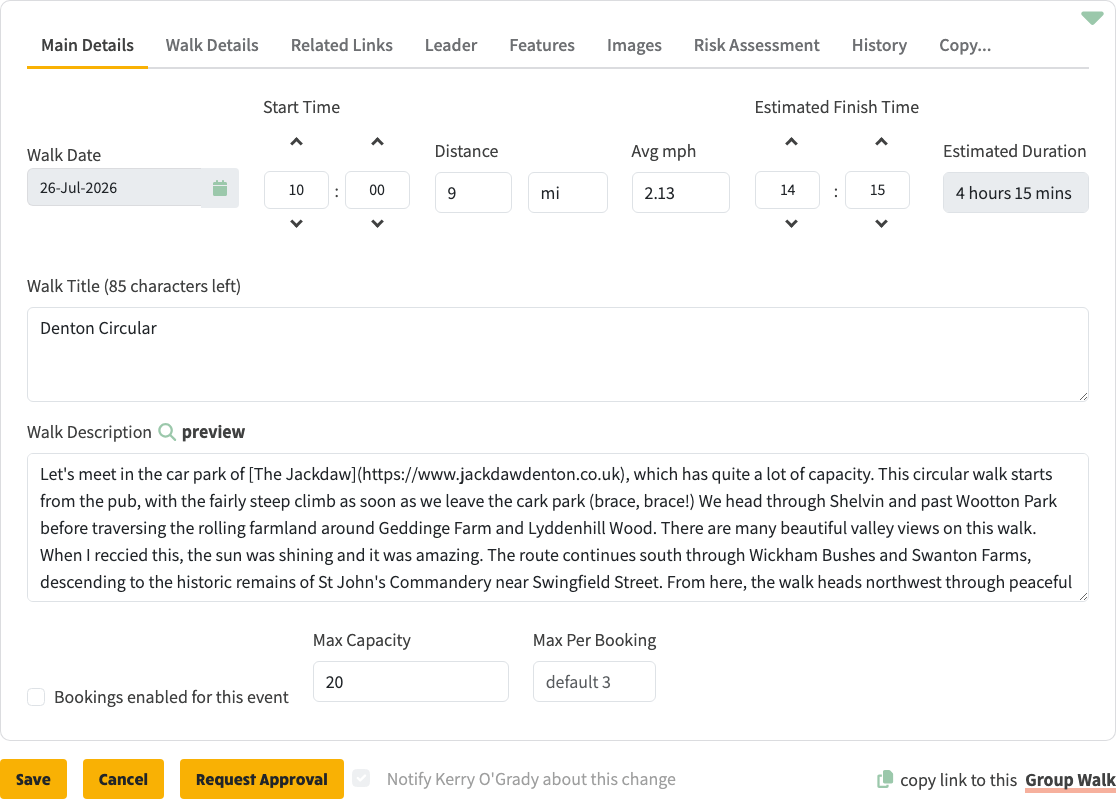
Tab 1: Main Details. Times, distance, title and description live here.
Three sub-tabs sit inside this tab, left to right:
Together the three sub-tabs answer "where do we meet?" and "what's the route?". The screenshot below shows the Route sub-tab populated with Moderate, Circular, 984ft ascent.
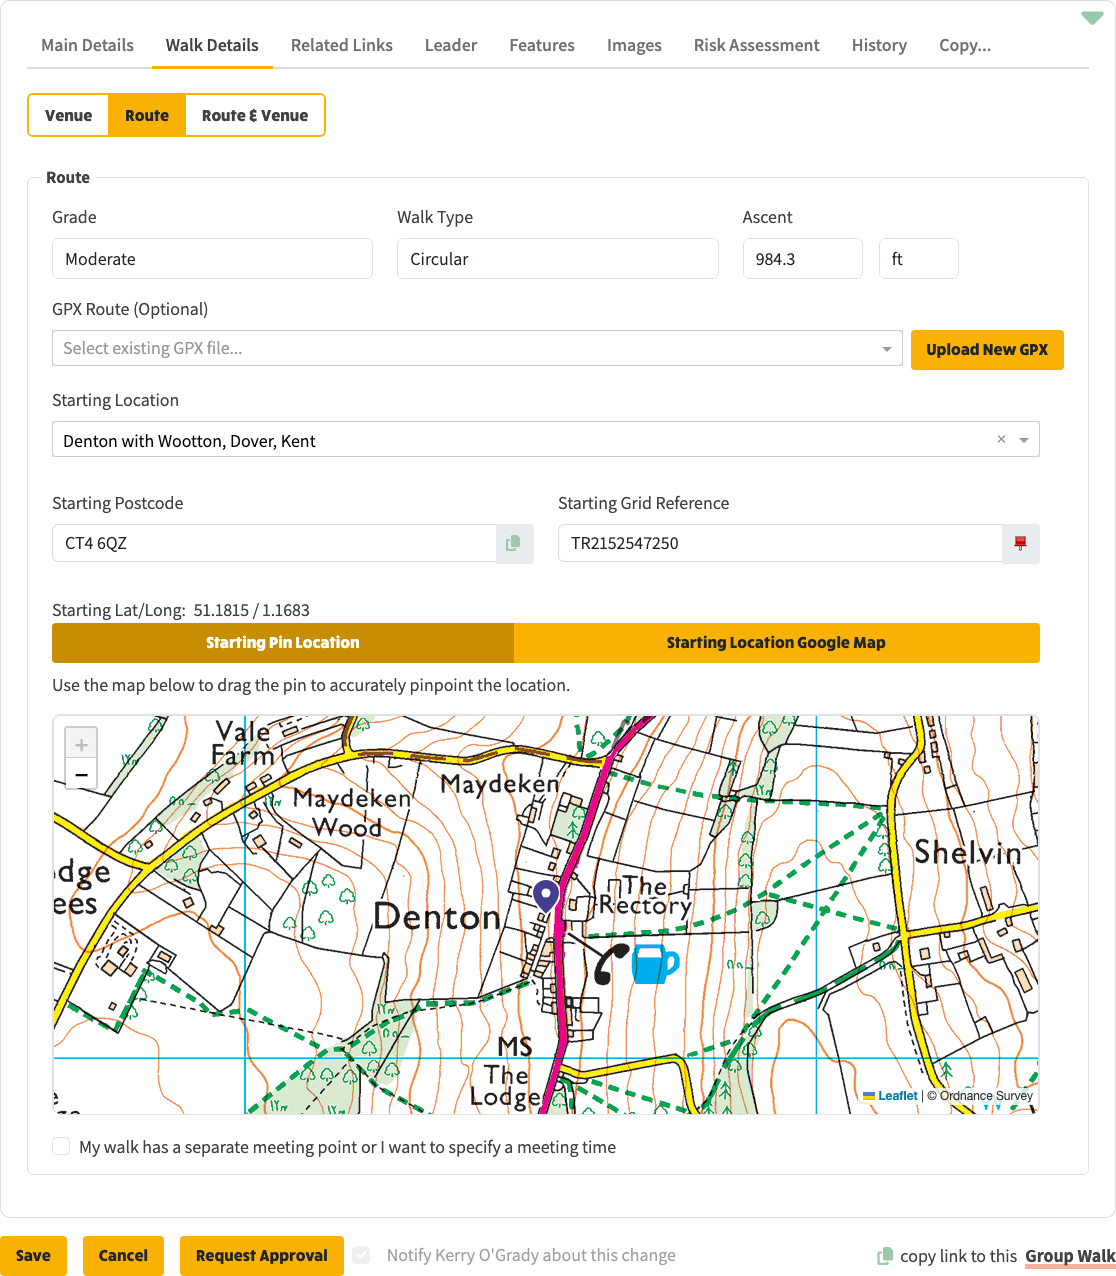
Tab 2: Walk Details, Route sub-tab. Grade, walk type, ascent and an optional GPX route file.
This tab is where the walk connects to external systems. Three sub-tabs split it up:
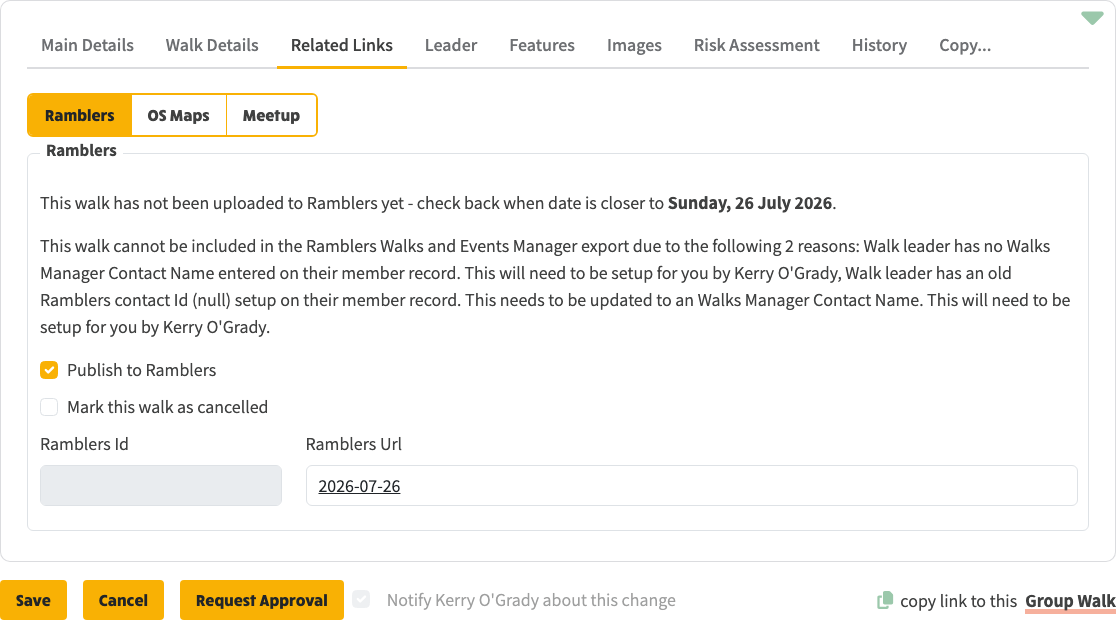
Tab 3: Related Links, Ramblers sub-tab. Publish to Ramblers is ticked; the Ramblers Id is empty and will be filled in when the next export runs.
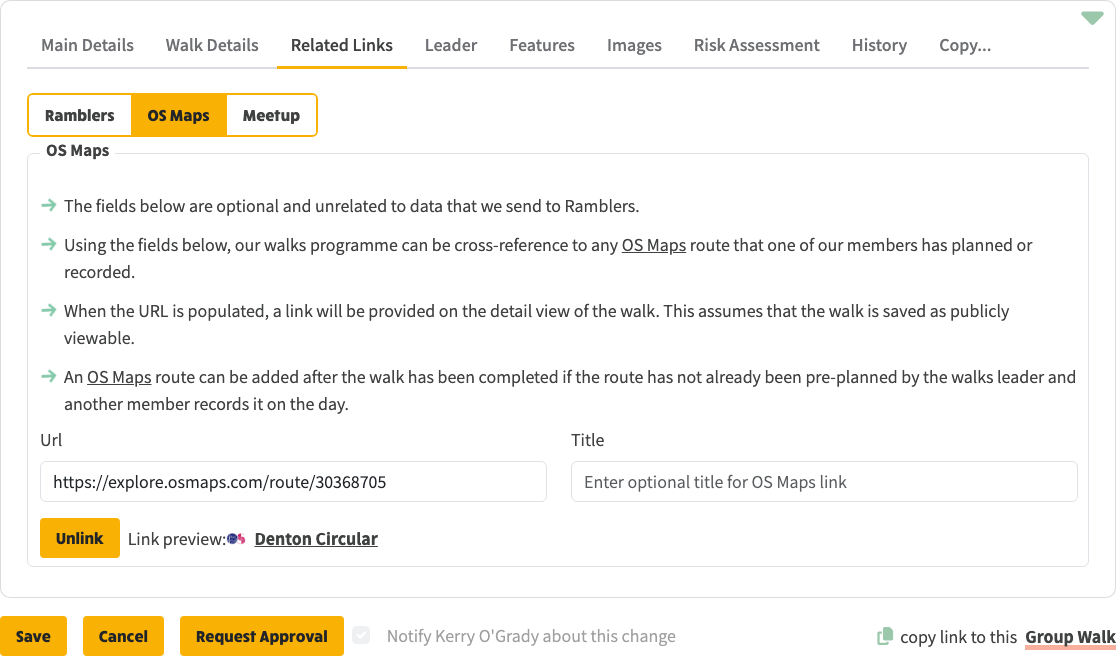
Tab 3: Related Links, OS Maps sub-tab. An OS Maps URL has been pasted in - the link preview confirms it resolves to the Denton Circular route.
Holds the walk leader's contact details: phone number and email address. These default to the values from your member profile but can be overridden per walk - useful when a different number applies for that day.
The two values feed the Group Walk Leader card visitors see on the public site, and they also feed the Walks Manager Contact when the walk is exported. If a leader is not yet matched to a member record, Tab 4 has the controls to do that match.
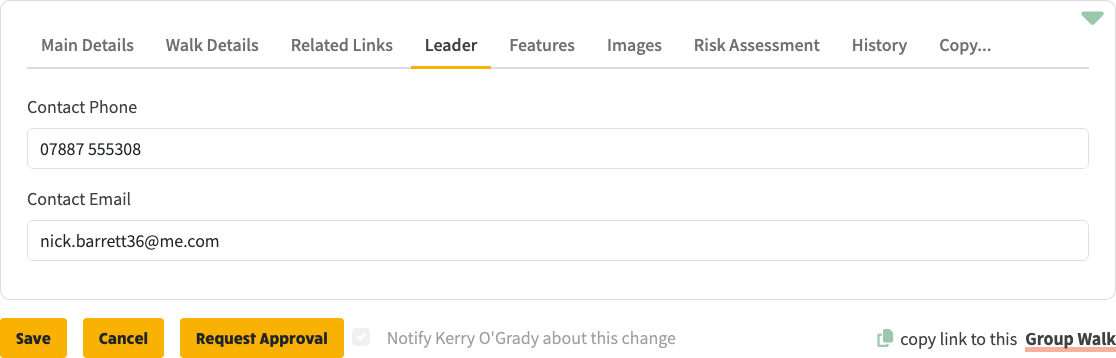
Tab 4: Leader. Contact phone and email default from the member record.
A grid of checkboxes describing what's available on the walk. Three groups:
Tick everything that genuinely applies - the more accurate this is, the more searchable your walk becomes on the Ramblers site.
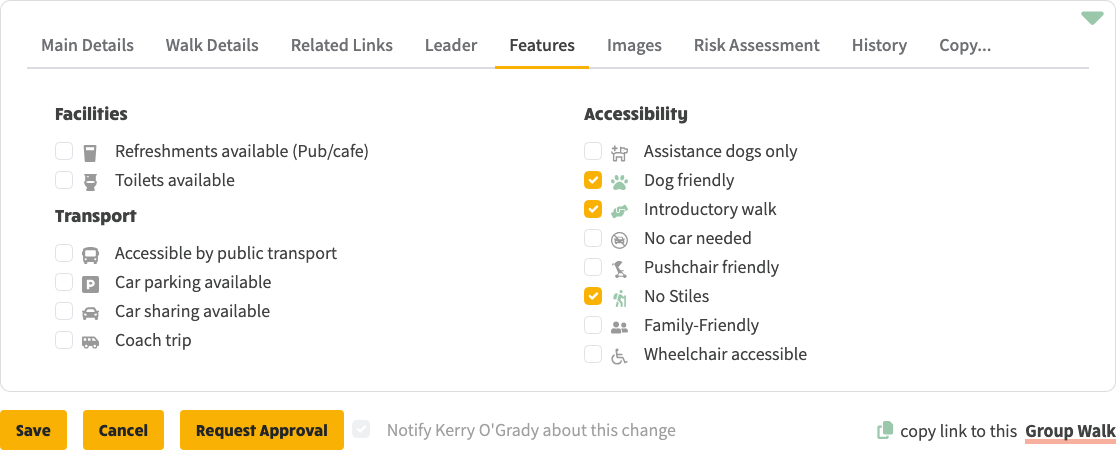
Tab 5: Features. Facilities, transport, accessibility checklists.
Choose between three image sources:
For Local, the upload control accepts standard image formats and stores the file under the walk's S3 folder.
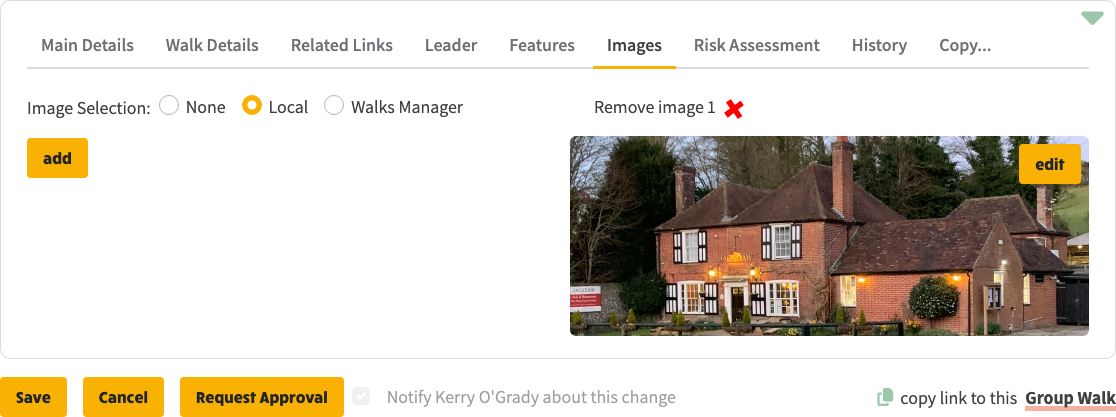
Tab 6: Images. None / Local / Walks Manager selector.
A structured set of questions covering the five categories Ramblers requires walk leaders to confirm:
The wording on this tab is the group's, not the walk's. You edit the guidance once and it applies to every walk. Leaders review that same assessment and tick that they have, rather than writing a new one or downloading a PDF. A record of each walk leader's acknowledgement is stored against that walk, and it stays there. Do not publish risk assessment as a separate page for leaders to visit.
Each category has free-text notes plus a "Please confirm you have reviewed this section above" tickbox. A yellow status banner at the bottom shows which categories still need attention. The "Read more about guidance for group walks" link at the top opens the Ramblers Walk Leader Charter in a new tab.
The Risk Assessment tab only appears when two conditions hold:
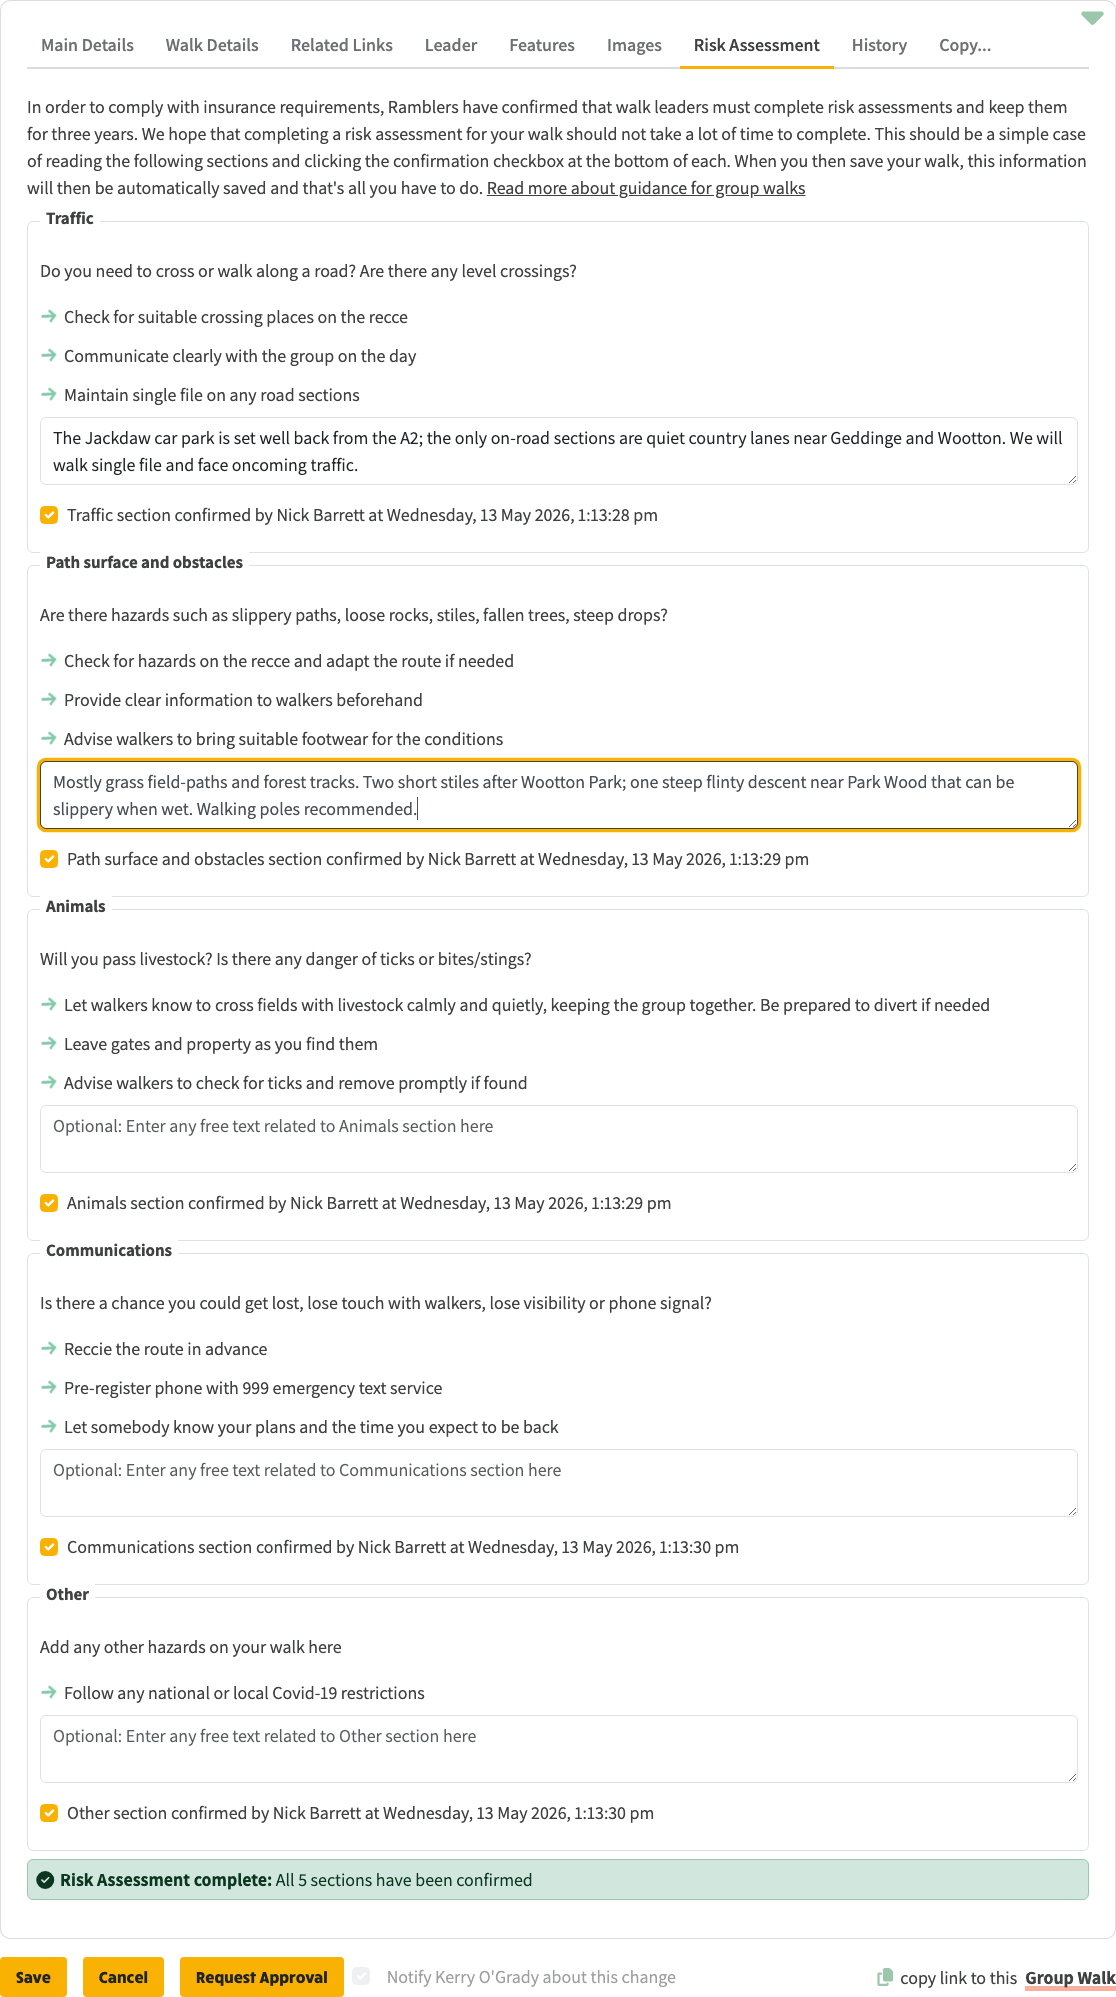
Tab 7: Risk Assessment. Five Ramblers-aligned categories, each with notes and a confirm tick.
A read-only audit log of every change made to this walk. Each row shows the timestamp, the member who made the change, the resulting event type ("Awaiting walk leader", "Awaiting walk details from leader", "Approved", etc.), and a comma-separated list of fields that changed in that step.
The History tab is visible to the walk leader and to admins only.
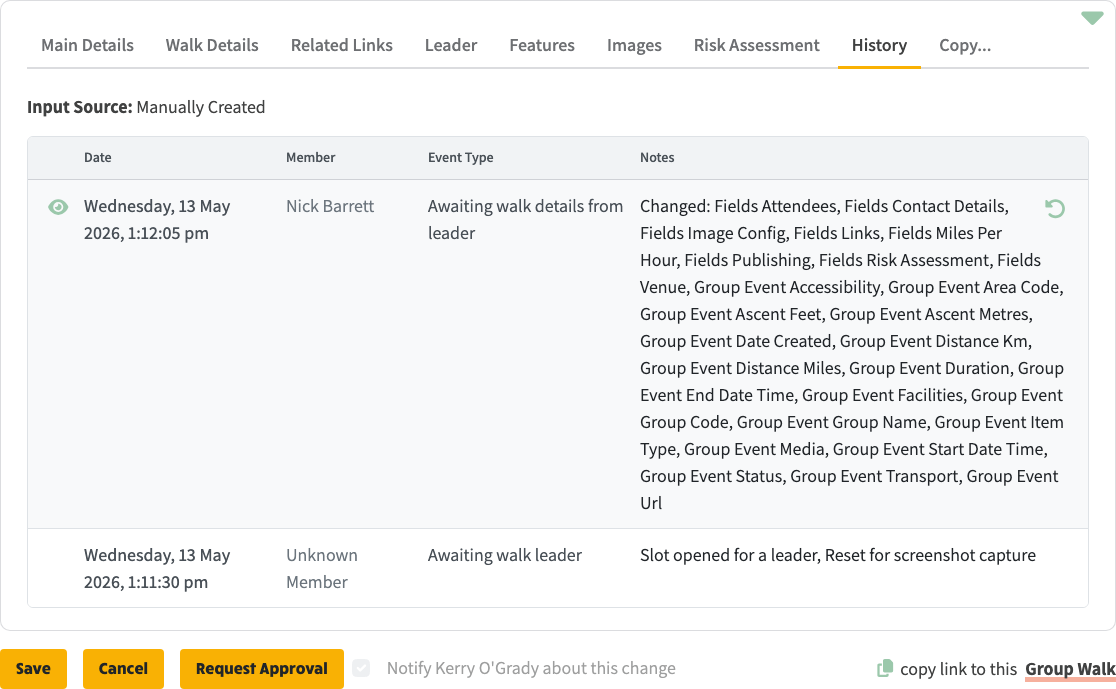
Tab 8: History. Every state change and every field change is logged with the member who made it.
A shortcut for re-using details from a previous walk:
The dropdown lists "Copy from N available walks". This is the fastest way to set up a repeat of a walk that already has a known good description, route file, and risk assessment.
This tab is only visible once the walk has a contact member assigned (i.e. after step 2 above).
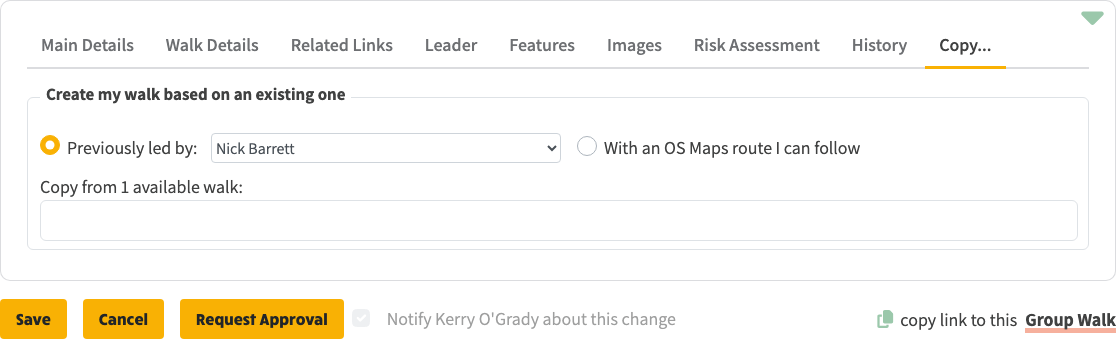
Tab 9: Copy... - clone an existing walk's details into the new slot.
The action buttons sit below the tabset and apply regardless of which tab is active. The set of buttons you see changes with the walk's current stage:
A Notify [coordinator] about this change toggle below the buttons decides whether the coordinator gets an email when you save.
The walk progresses through these stages in order. Each step is logged on the History tab so it is always clear who did what and when:
The screenshot below shows the completed Denton Circular walk after the final save - all nine tabs populated, Risk Assessment confirmed across the five sections, the green claim banner now dismissed.
Walk completed: all tabs populated, Risk Assessment confirmed across the five sections, walk is ready for Request Approval.